I love travelling. But I’m not about to spend an hour queuing up for a photo at a popular and crowded monument. It’s also too awkward to ask everyone in my view to leave just so I can have a clean background.
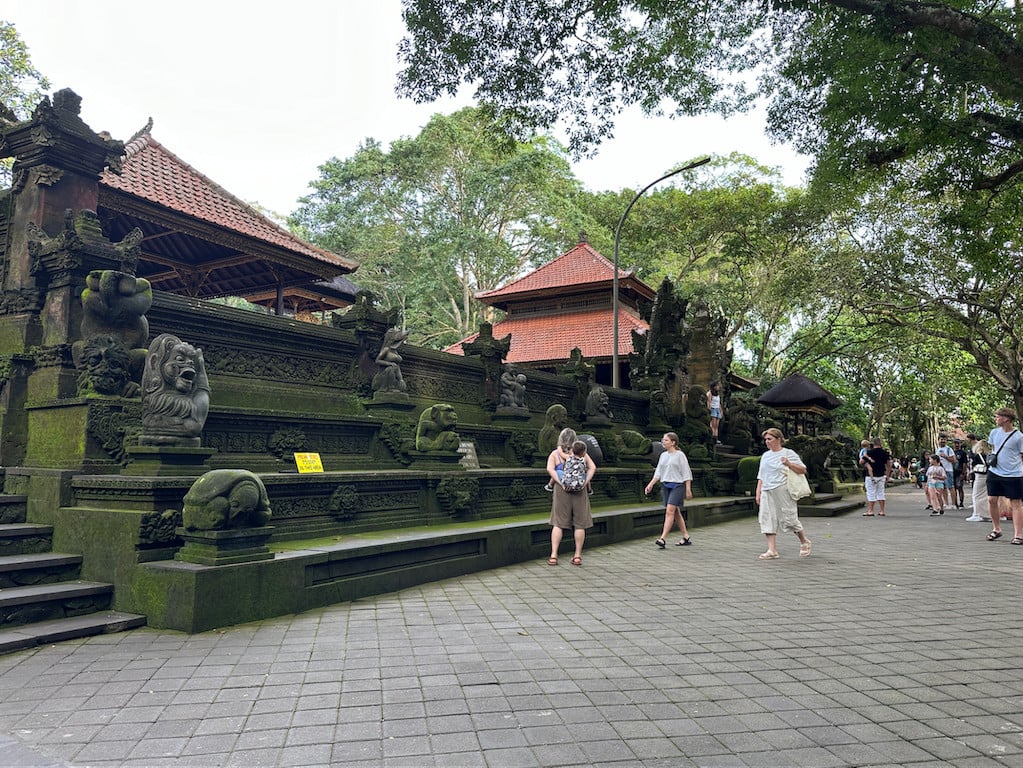
Take my Bali (Indonesia) trip, for example. It is one of the most overpopulated areas with tourists in the world. Getting a photo can be a hassle.
Editing photos and graphics is no longer a passion of mine, but I do like casual photography and I really want my photos to reflect a pleasant memory, minus other tourists. Unfortunately I left behind my Adobe Photoshop skills with Photoshop 7.0 (2002).
I’m not exactly a big Artificial Intelligence (AI) fan, but I’ve been enjoying fooling around with AI photo-editing software since many smartphones have the software built-in. I also just realised I should be a smarter tourist by editing strangers out of my photos with AI.
And I am actually amazed at the results. AI did come a long way for the better since they were first introduced to the public.
Best of all, using AI to erase people off is VERY easy with a photo editing software like Adobe Lightroom. *evil grin*

Editor
Jodee Tan chevron_right
Table of Contents
How To Erase People Off Photos With Adobe Lightroom
Generative AI
As long as you know how to “erase” something on screen, editing photos will feel like a walk in the park with Adobe Lightroom’s new Generative AI tool.
The Generative AI tool is capable of replicating photo backgrounds to remove items, fix complex patterns and avoid smudges, distortions, or dark spots.
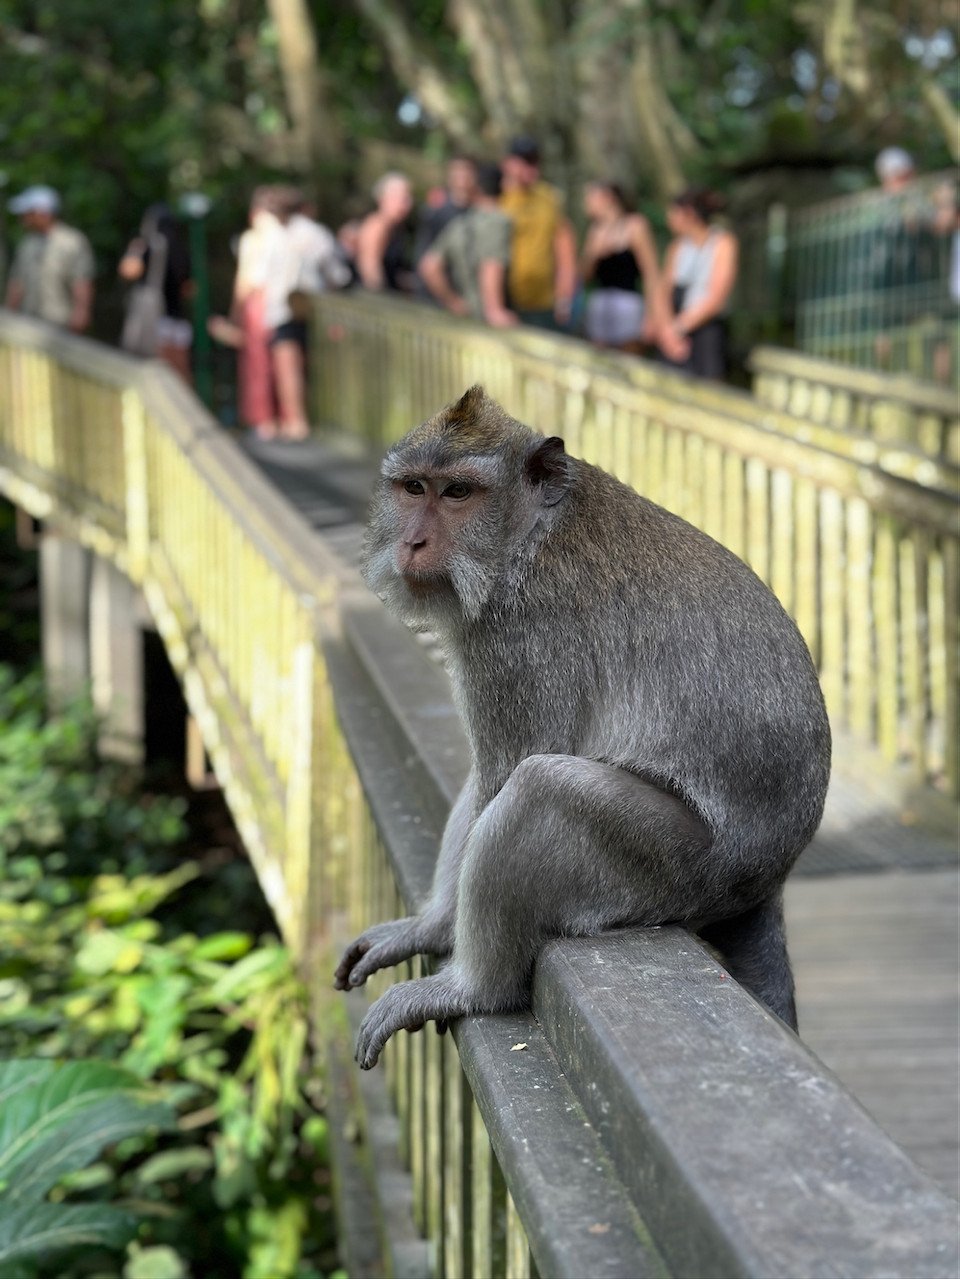
Here’s a photo of a monkey I took in the Ubud Monkey Forest, which is not too bad. But wouldn’t it be more epic to have the monkey alone?
To start, I uploaded my photo onto Adobe Lightroom website.
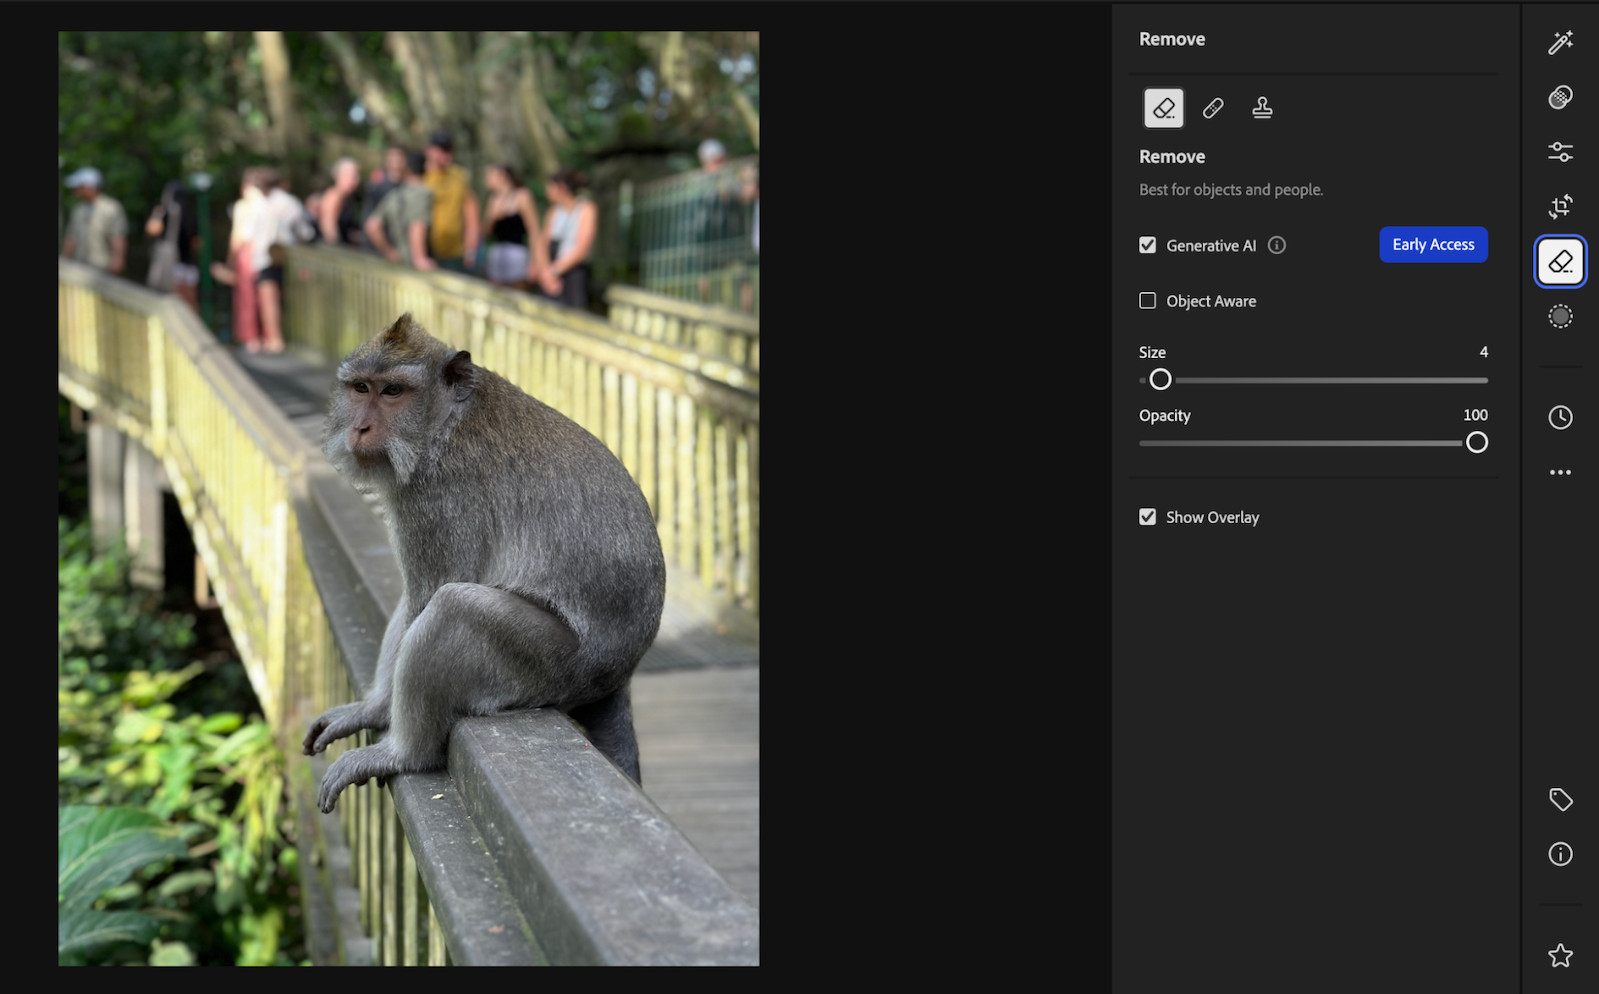
Once I’ve entered editing mode, I clicked on the “Eraser” icon tool, and chose “Remove”. Since I want to erase everyone in the background, I chose to activate Generative AI which is better for editing a bigger surface area.
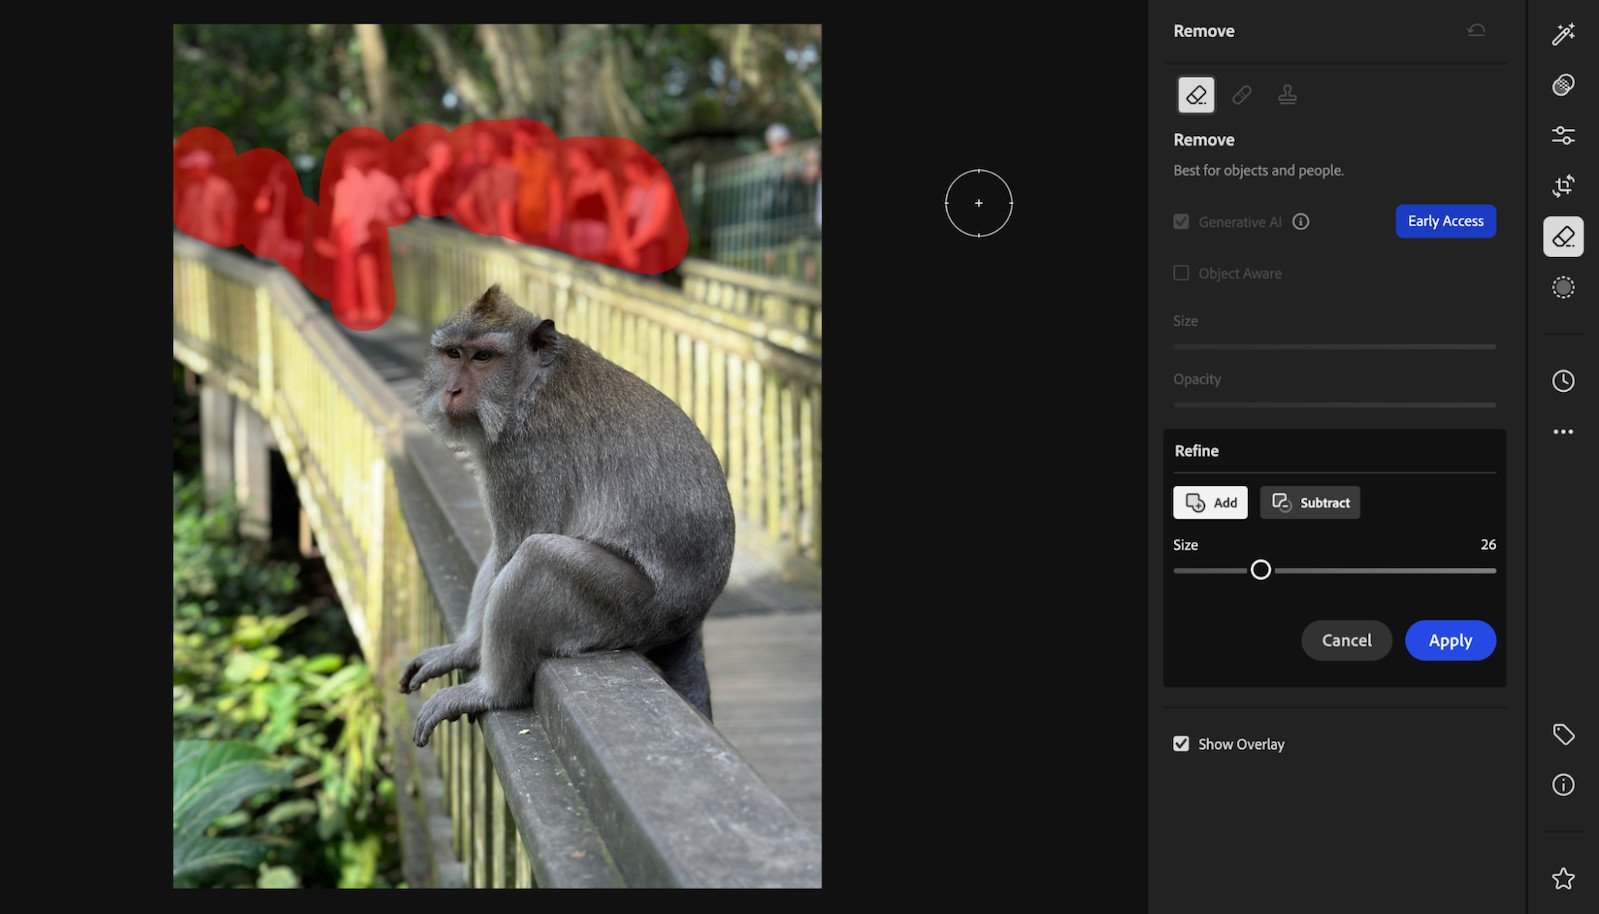
After adjusting how big I want the “eraser” to be, I started to drag my cursor over and “Erase” everyone. Once satisfied, I clicked “Apply”.

And, they are gone!... I think…?
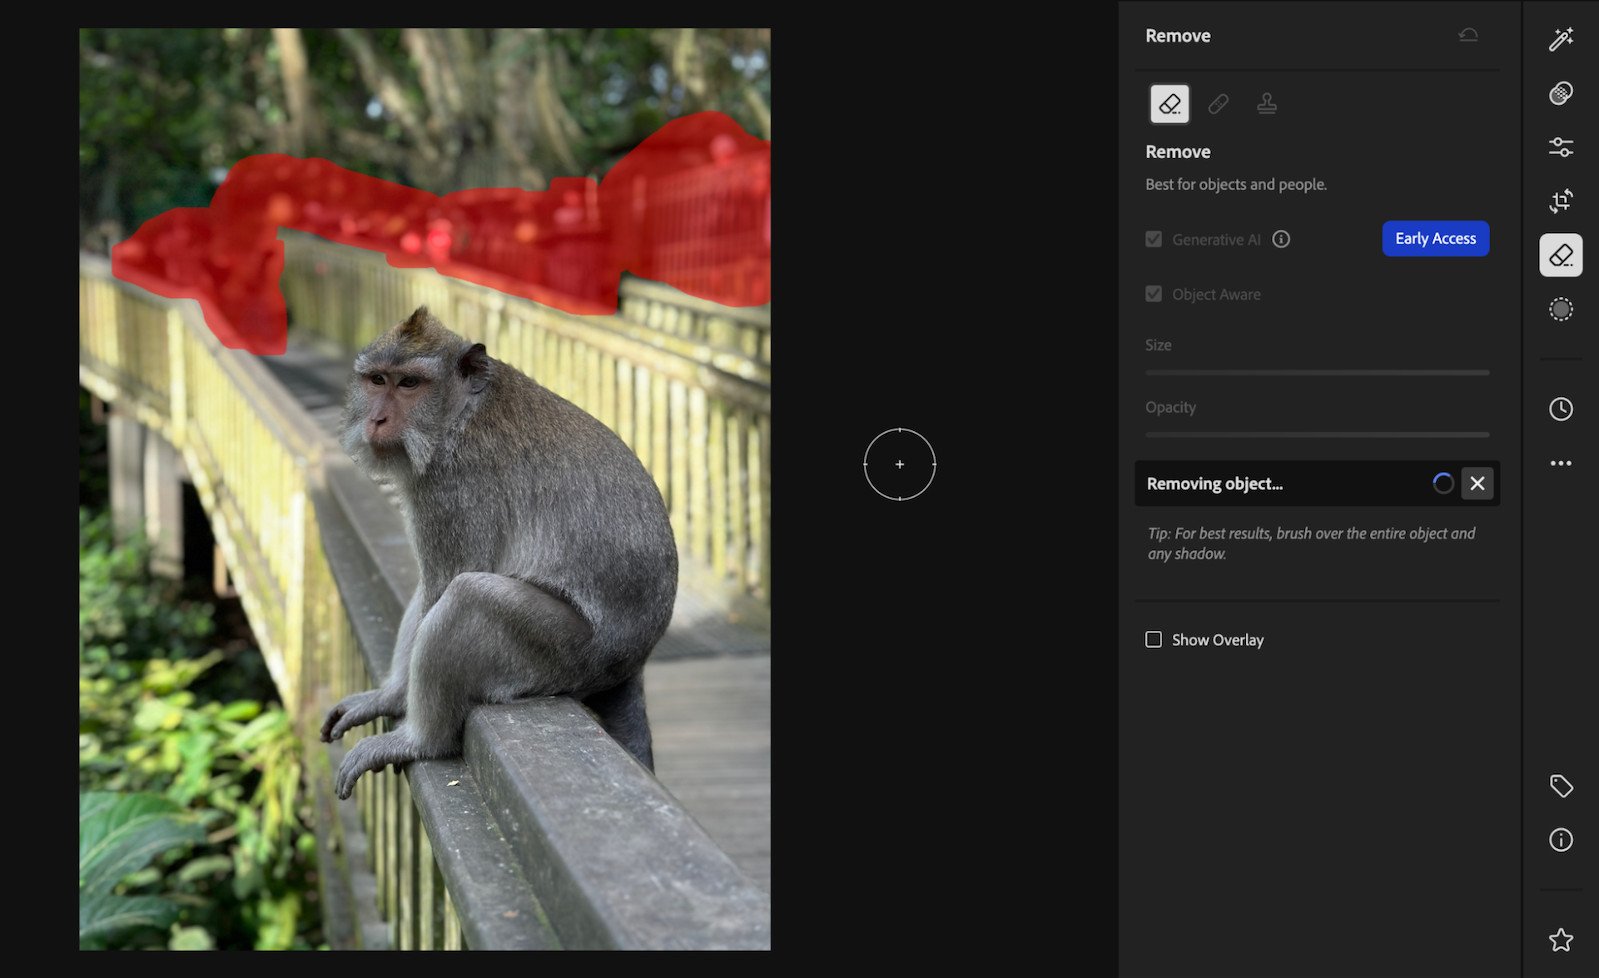
Thinking that the background could be better, I decided to go over the areas again, including the person on the top right corner.

This is the result. Although the original fixtures (the fence) were replaced with trees, the result looked so natural that I didn’t mind it.
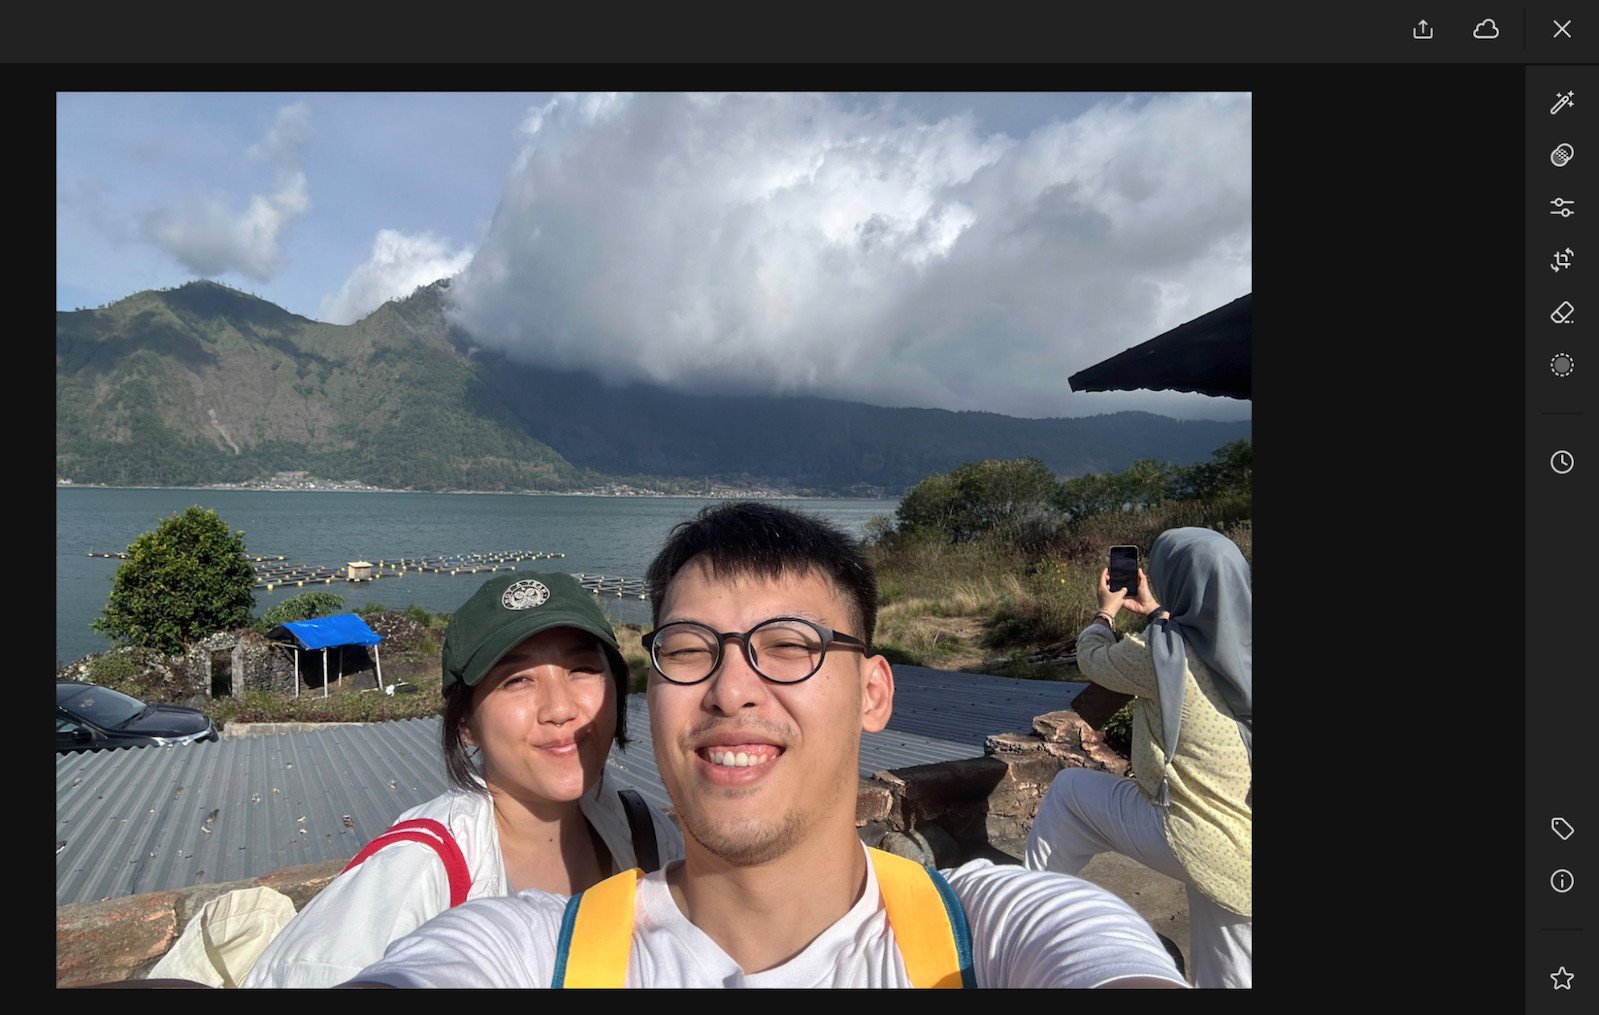
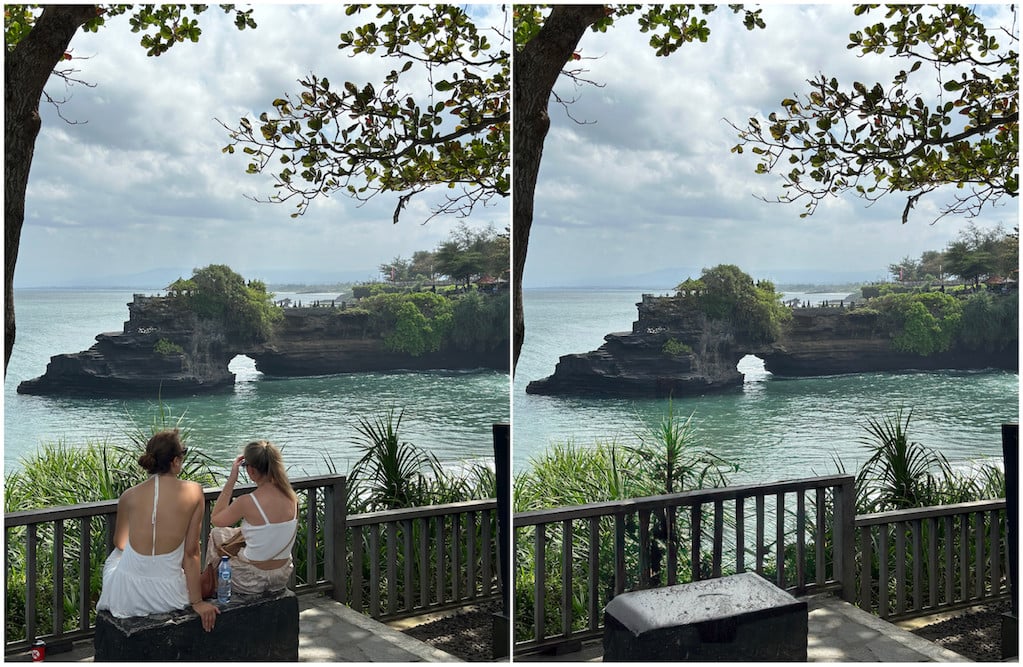
Here’s another photo of my husband and I at Mount Batur in Bali. Scenic, but graced by a stranger and a car behind us.
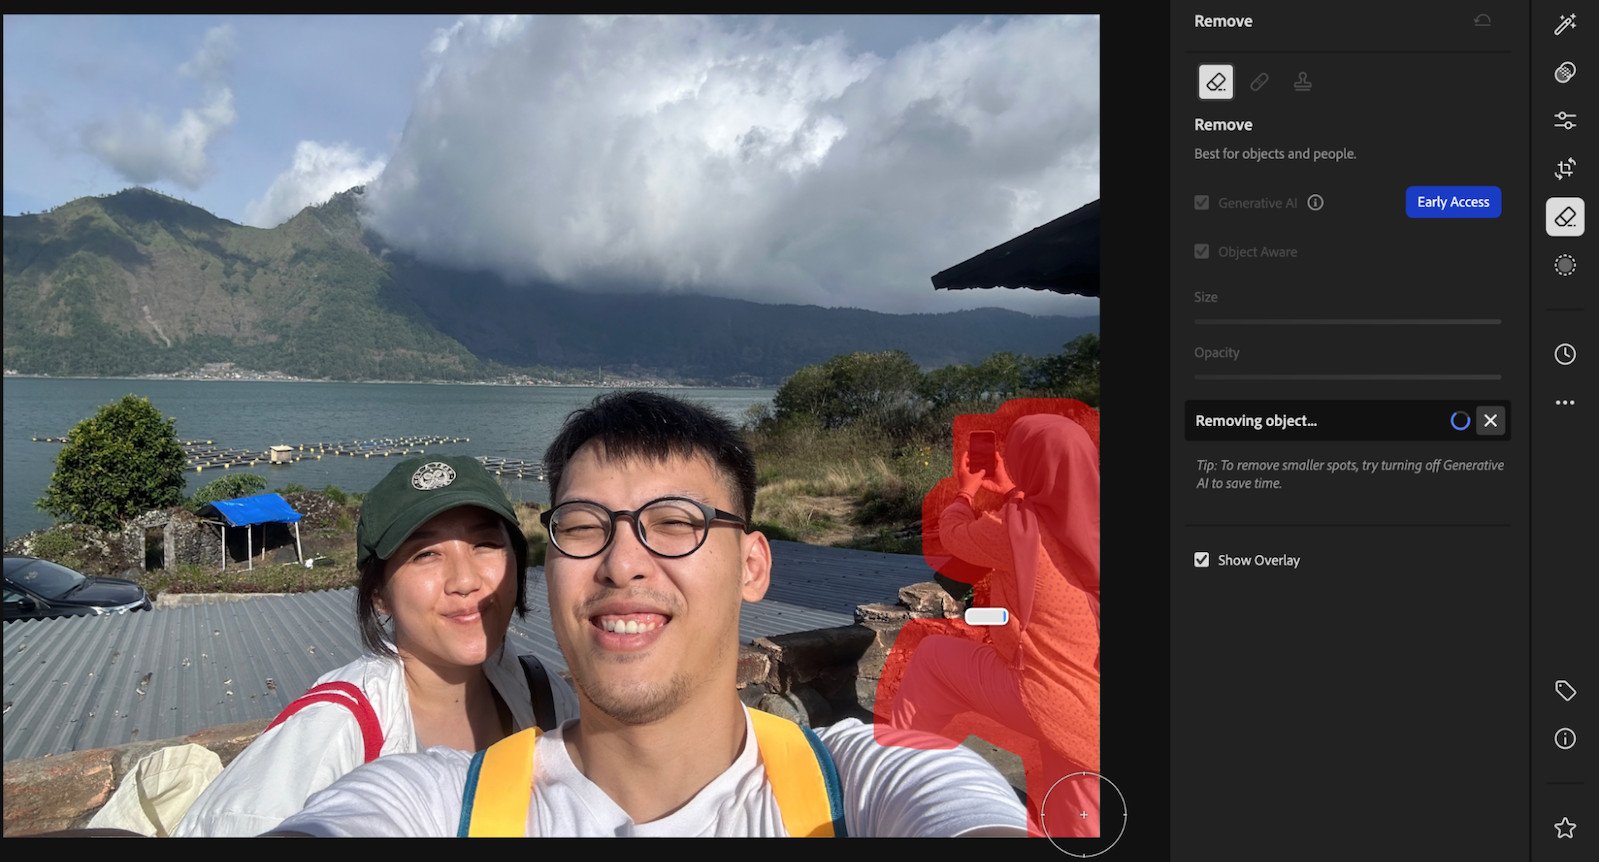
Repeated my steps again…
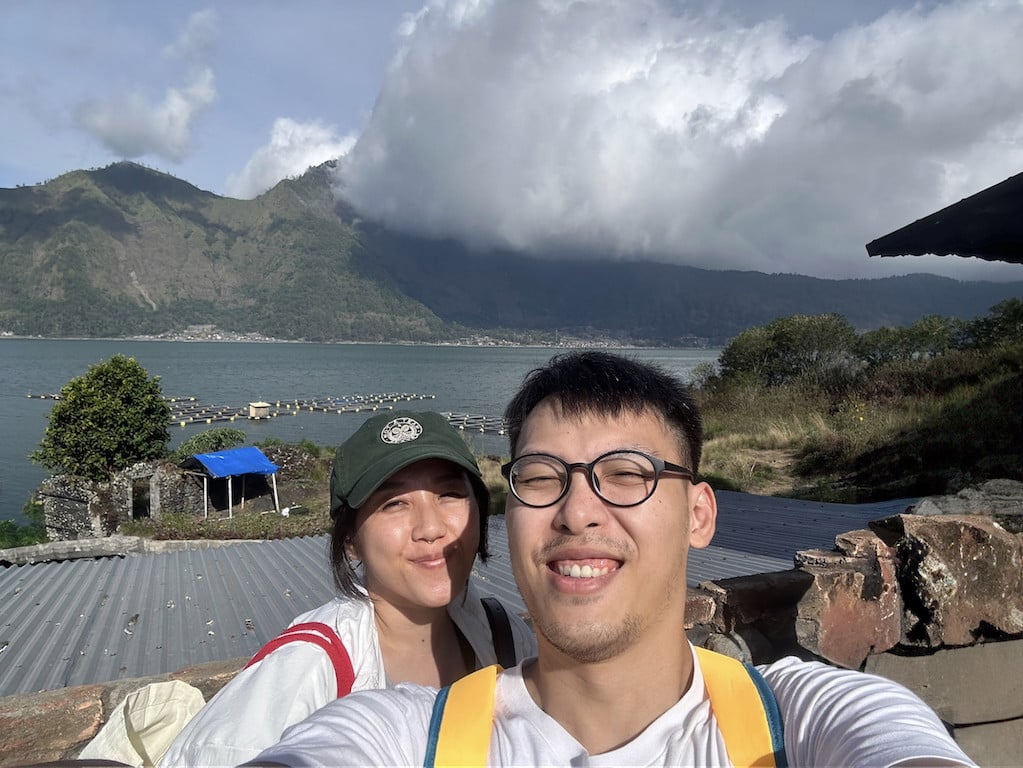
And this is the result!
Lens Blur
Adobe Lightroom’s “Lens Blur” feature also allows me to add blur for a “telephoto” portrait look whenever my phone’s camera fails me. And it’s usable on portraits, cityscapes, and street/urban photography.
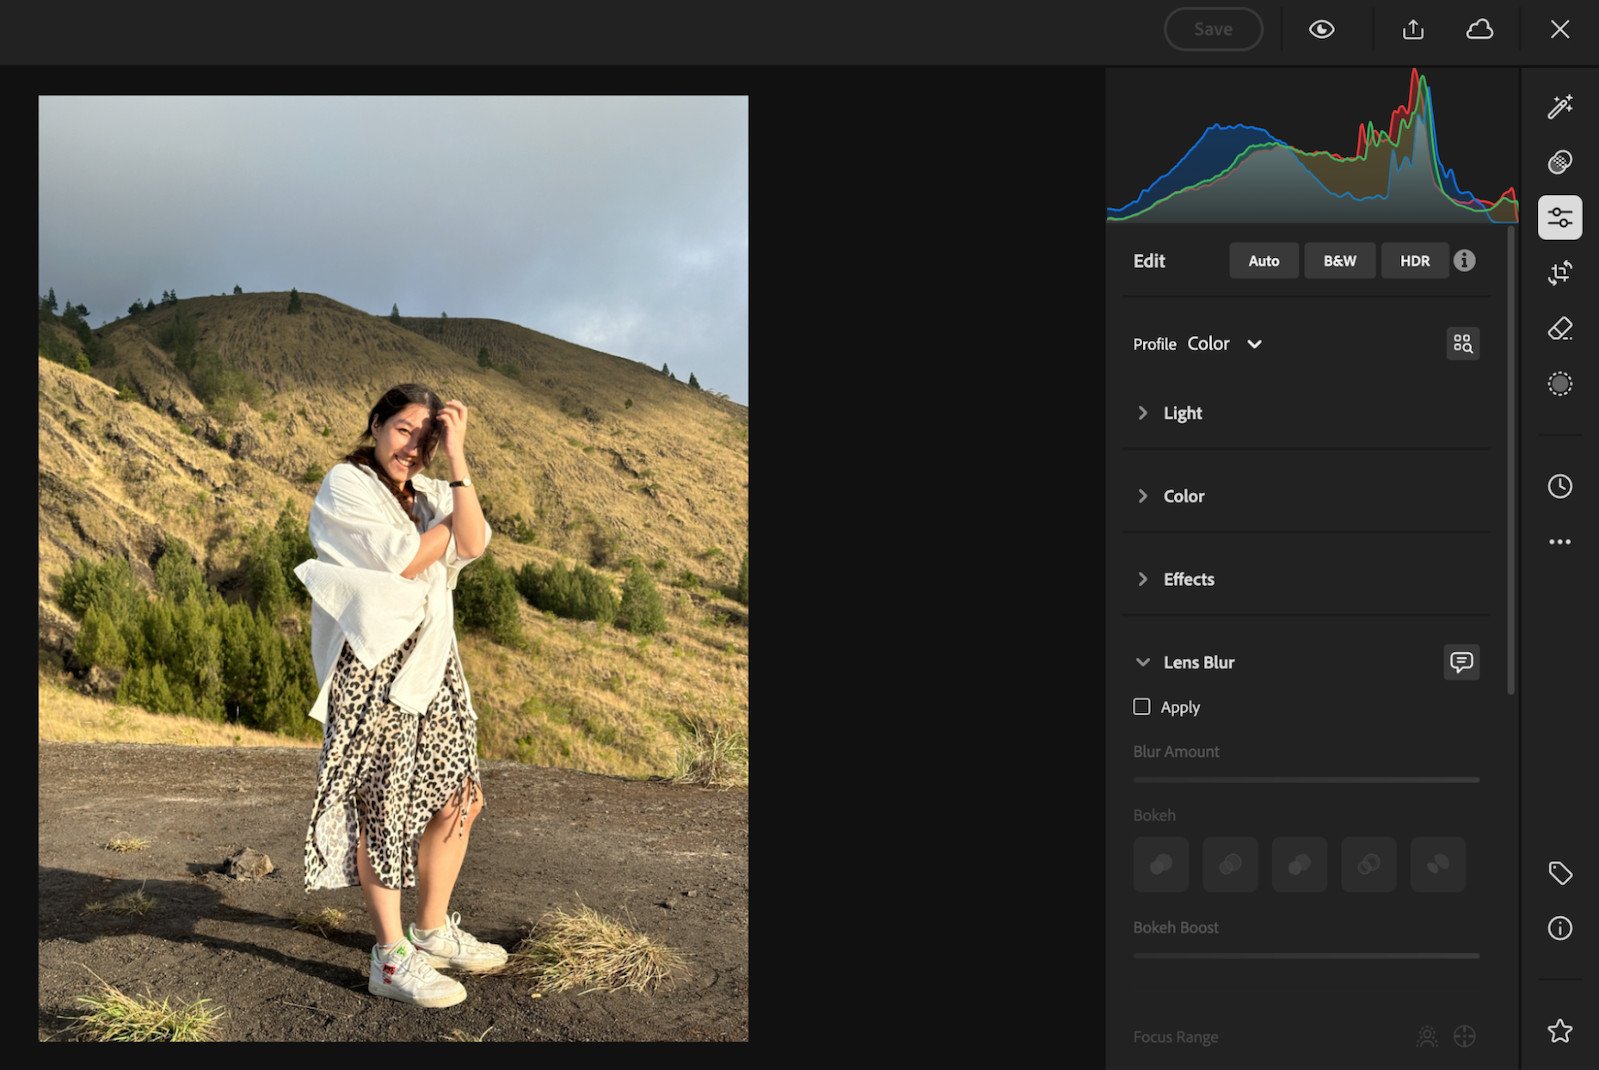
I think this photo of me on Mount Batur would look more grand with a blurred background. I went into the “Editor” section, and scrolled down to “Apply” Lens Blur.
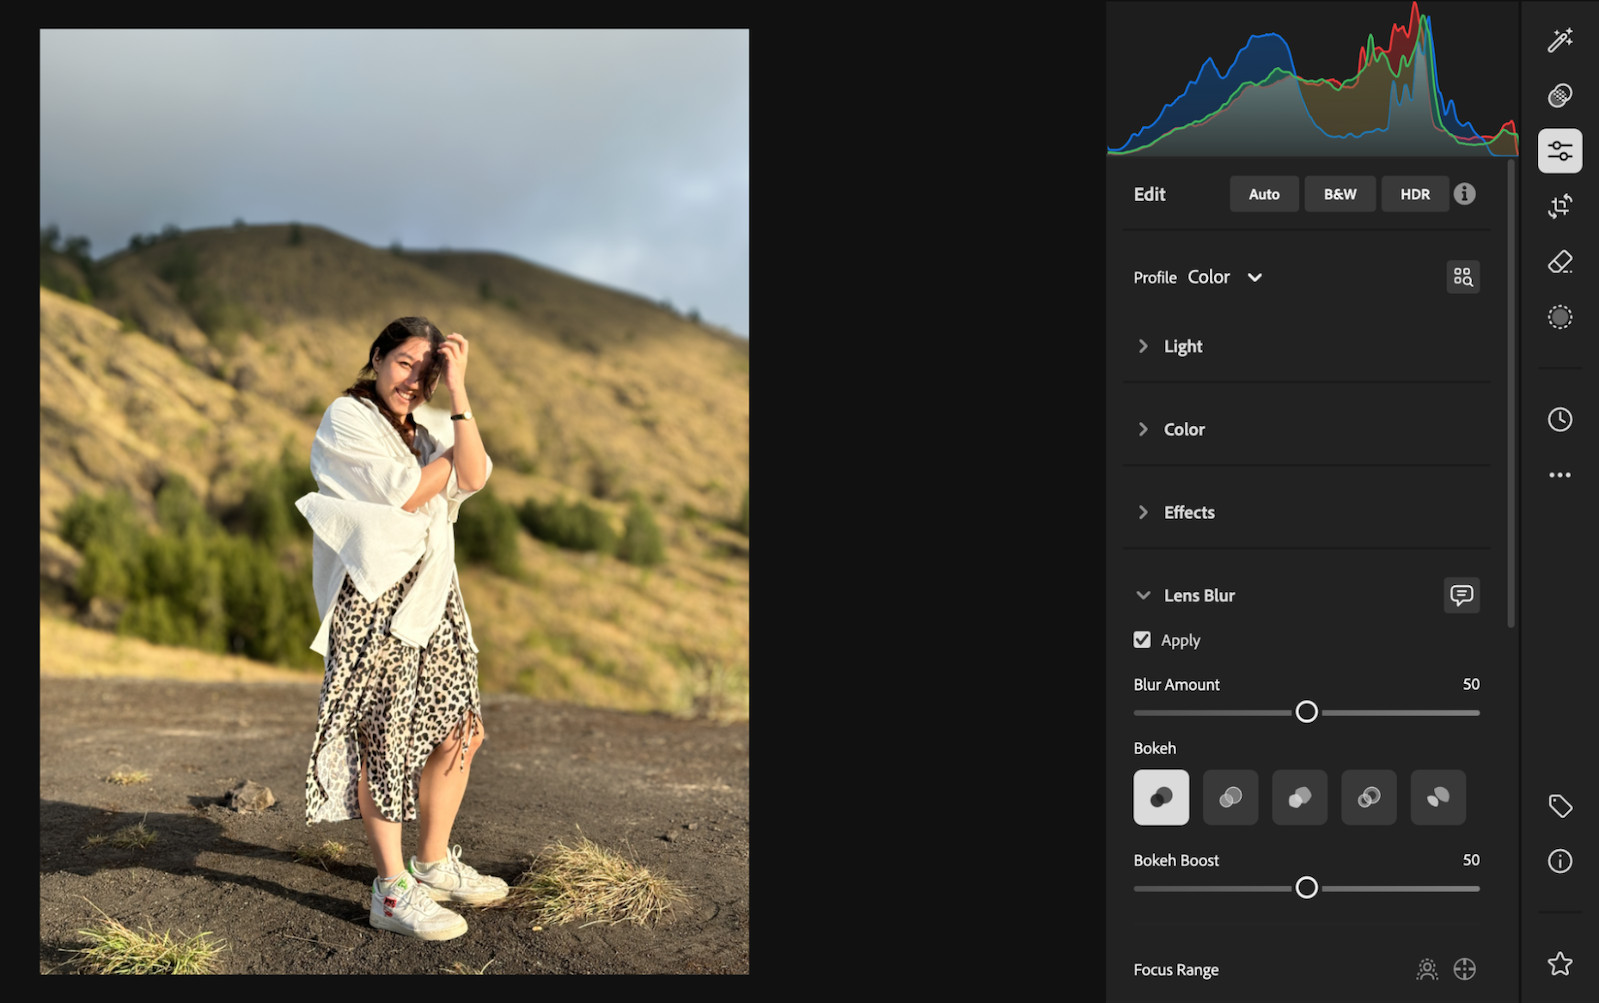
After processing, results were already ready to go! But I wanted a better focus of just myself, limiting the background (the rock behind me). And it was confusing to know if Lightroom’s AI knew where to blur.
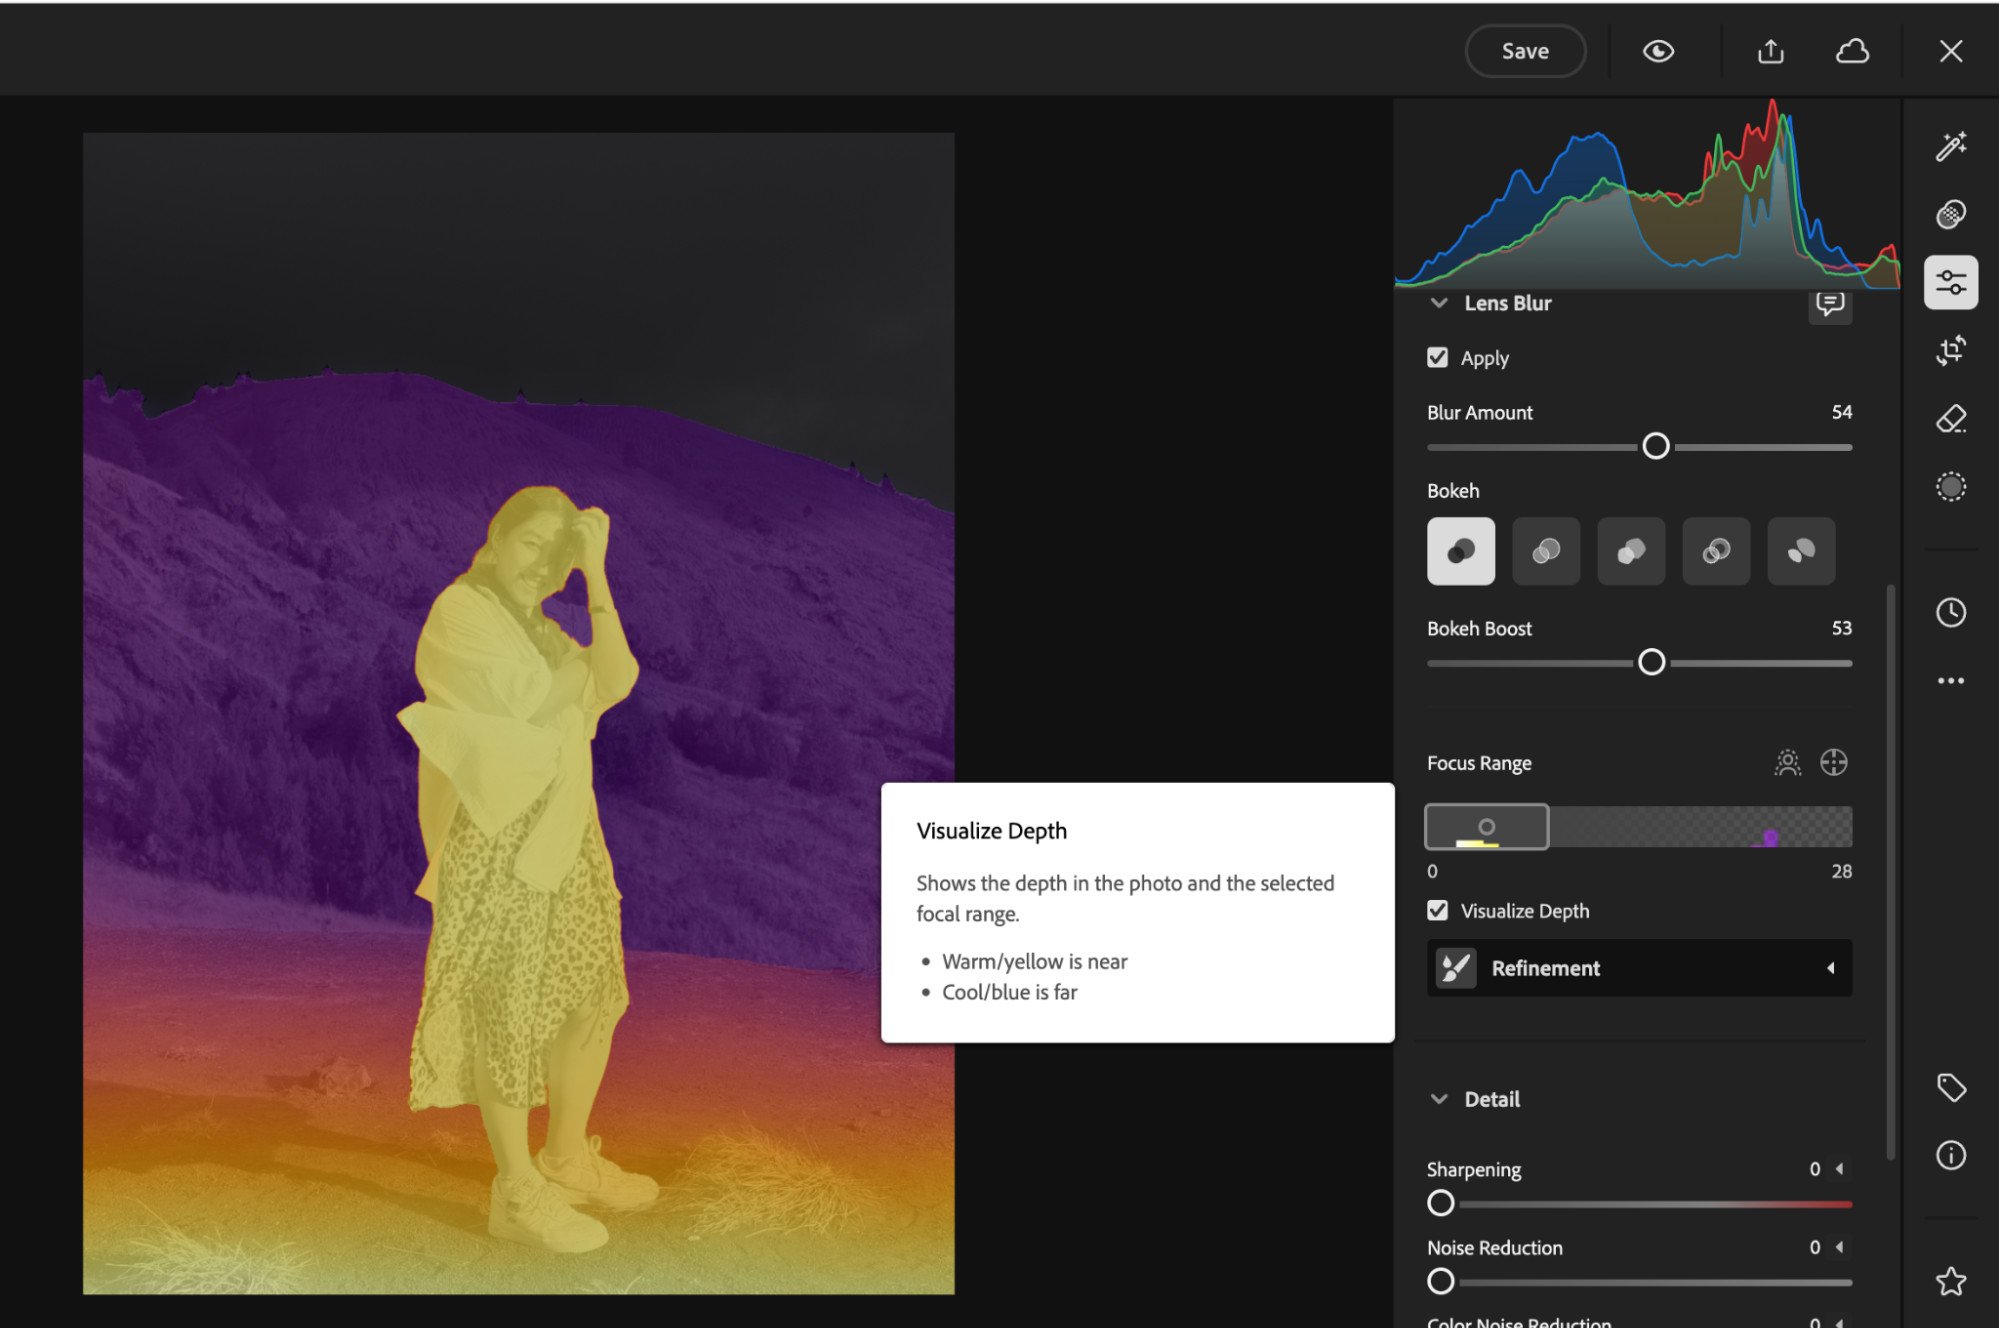
I activated the Visualise Depth tool to see what the AI was looking at.
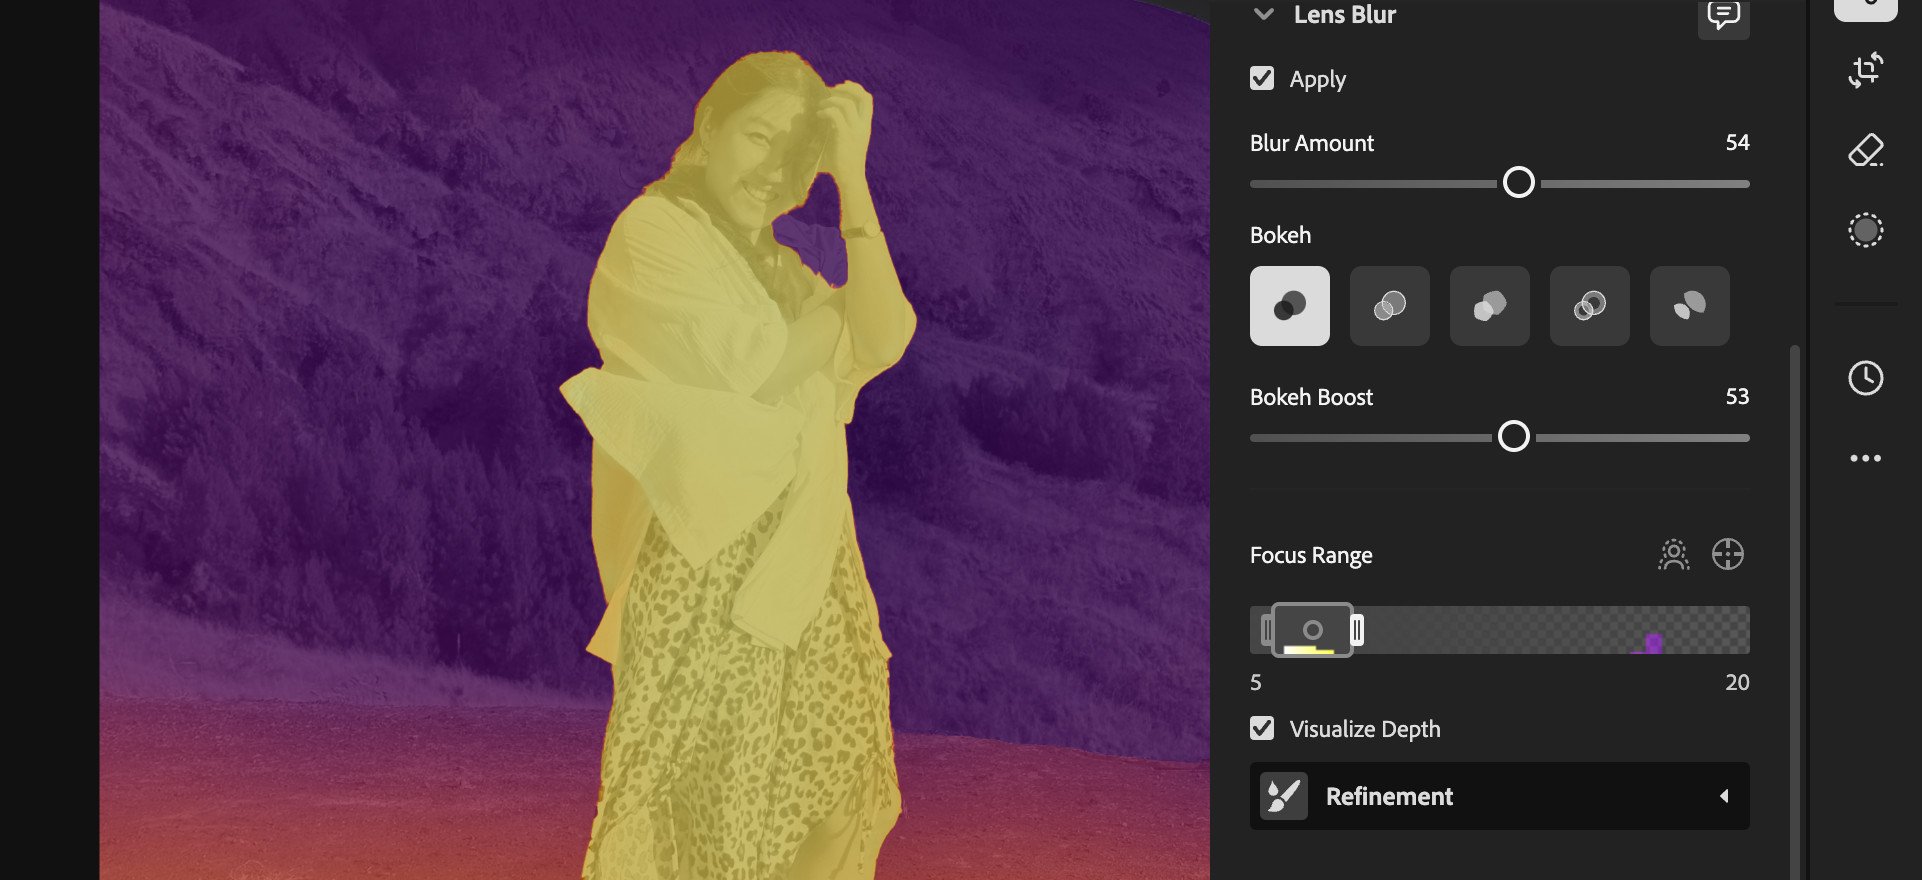
I also adjusted and limited the “Focus Range” so that it includes less of my background.
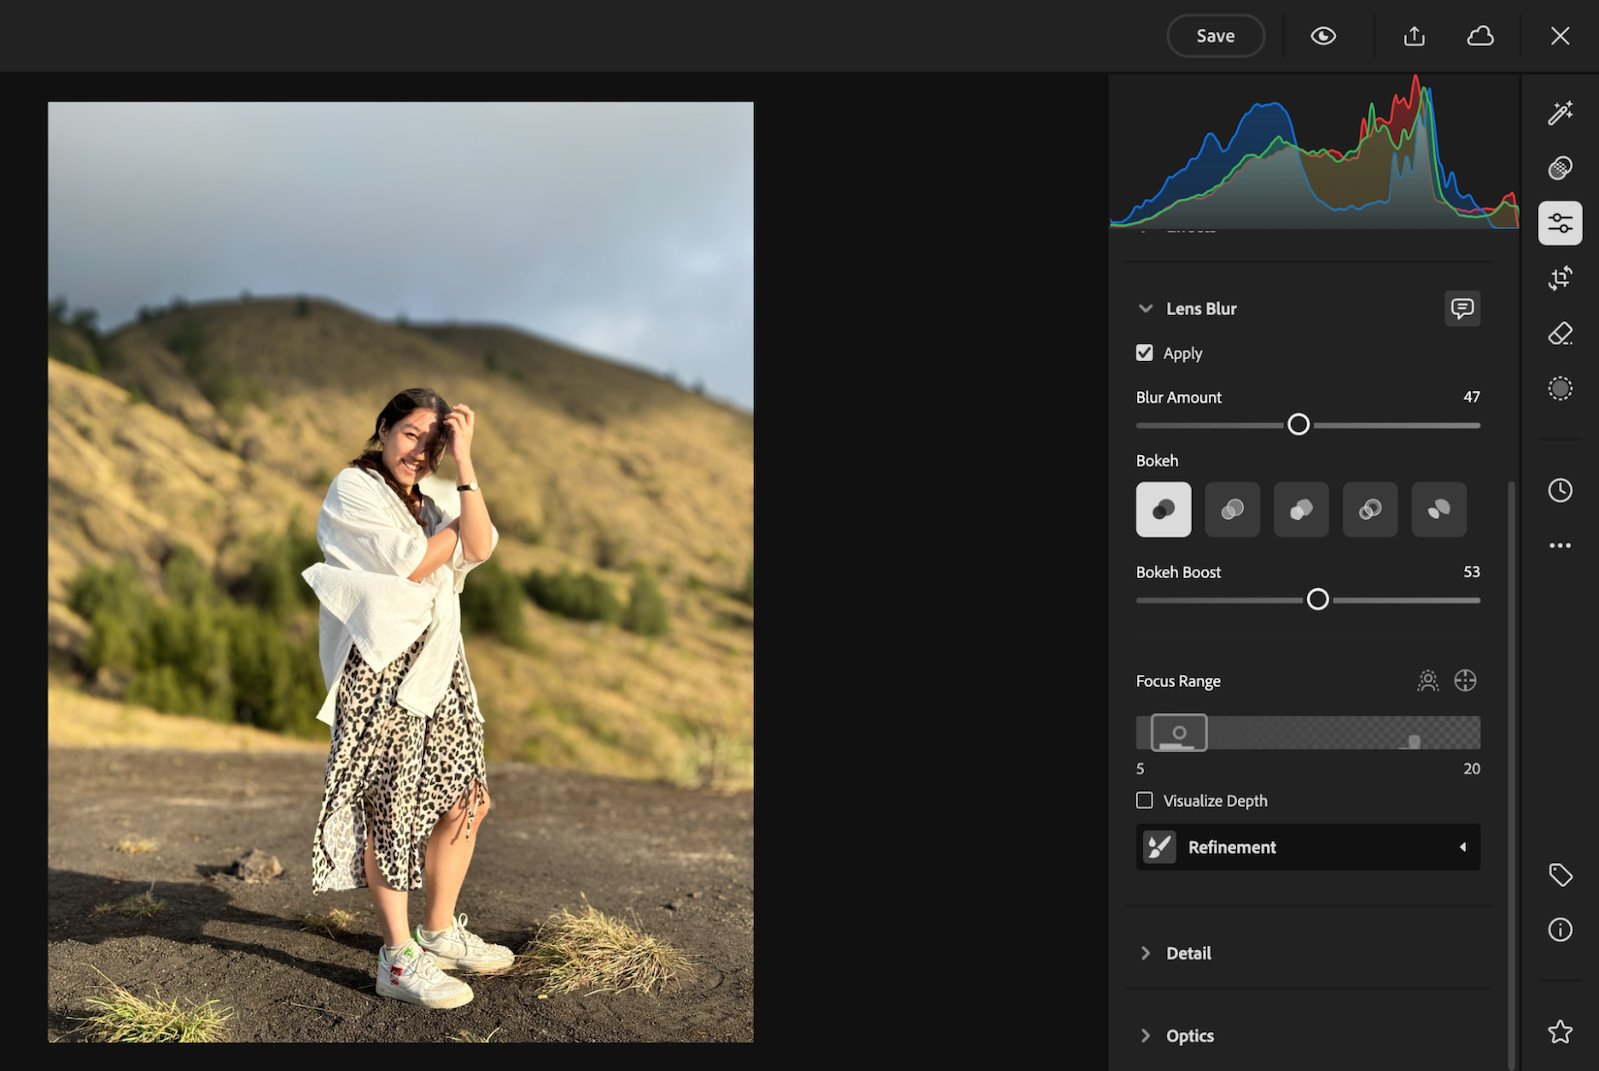
The final look!
Try Adobe Lightroom For Free
Adobe’s Lightroom used to be a casual photo editor on my smartphone that I would use for touching up on lighting and colour filters. It’s definitely nice to know that these two new AI features offer advanced results without me needing to invest much time to learn it.

The tools introduced here are available in Adobe Lightroom’s Premium subscription, both on desktop website and mobile app.
Monthly desktop prices start from RM 29 whereas mobile app prices start from RM 8. While my preference would be the mobile app version, it’s definitely worth investing in the desktop version too because of how much easier and faster it is for editing.
[This post was made in collaboration with Adobe Lightroom.]