
There are so many ways you can unleash your creativity with the power of double-exposure photography, but our favourite so far is silhouette photography, where you can combine the simplicity of a silhouette with complex scenery to create a thought-provoking photo.
As we’ve written about several times before, you don’t actually need fancy gear or expensive software to create a double or multiple-exposure photo. All you need is a good enough smartphone, like a Samsung Galaxy S23 Ultra.
The concept of double exposures dates back to the early days of photography, where smartphones were a little more than a figment of our fantasy and film cameras reigned. Double-exposed photography is created by exposing the same piece of film twice, creating an overlay of two images.

Source: iStock
Back then, double exposures happened a lot by accident. Nowadays, though, double exposure has become more accessible with the advent of digital photography, so pretty much anyone and everyone can create these intricate compositions with just a click (or two).
Even through the years, double exposure over silhouettes still remains the most popular fusion, as it results in a unique and creative photography style that pushes the boundaries of traditional photography.

Editor
Jennifer chevron_right
Table of Contents
How To Capture Creative Silhouettes With A Smartphone
Creating double-exposure silhouettes on the Galaxy S23 Ultra isn’t exactly hard, but you really need a healthy amount of patience and artistic vision. We’ve done plenty of other double and multiple exposures before, so here’s a guide specific to creative silhouette double exposure!
For this article, we’re using the Samsung Galaxy S23 Ultra with ExpertRAW installed. The app is available in the Galaxy Store and will be integrated into your Camera app itself once downloaded.
1. Get Your Model To Stand In Front of A Bright Background
Your first “exposure”, or photo, is where you’ll get the shape of your silhouette, so you’ll need a model to pose in front of a bright light source. You’ll get the best results with the side profile of your subject, as that’s how you’ll get the distinct features.
Ideally, your background should be plain or neutral, as that reduces the likelihood of random colours interfering with how your second exposure overlays on the first.
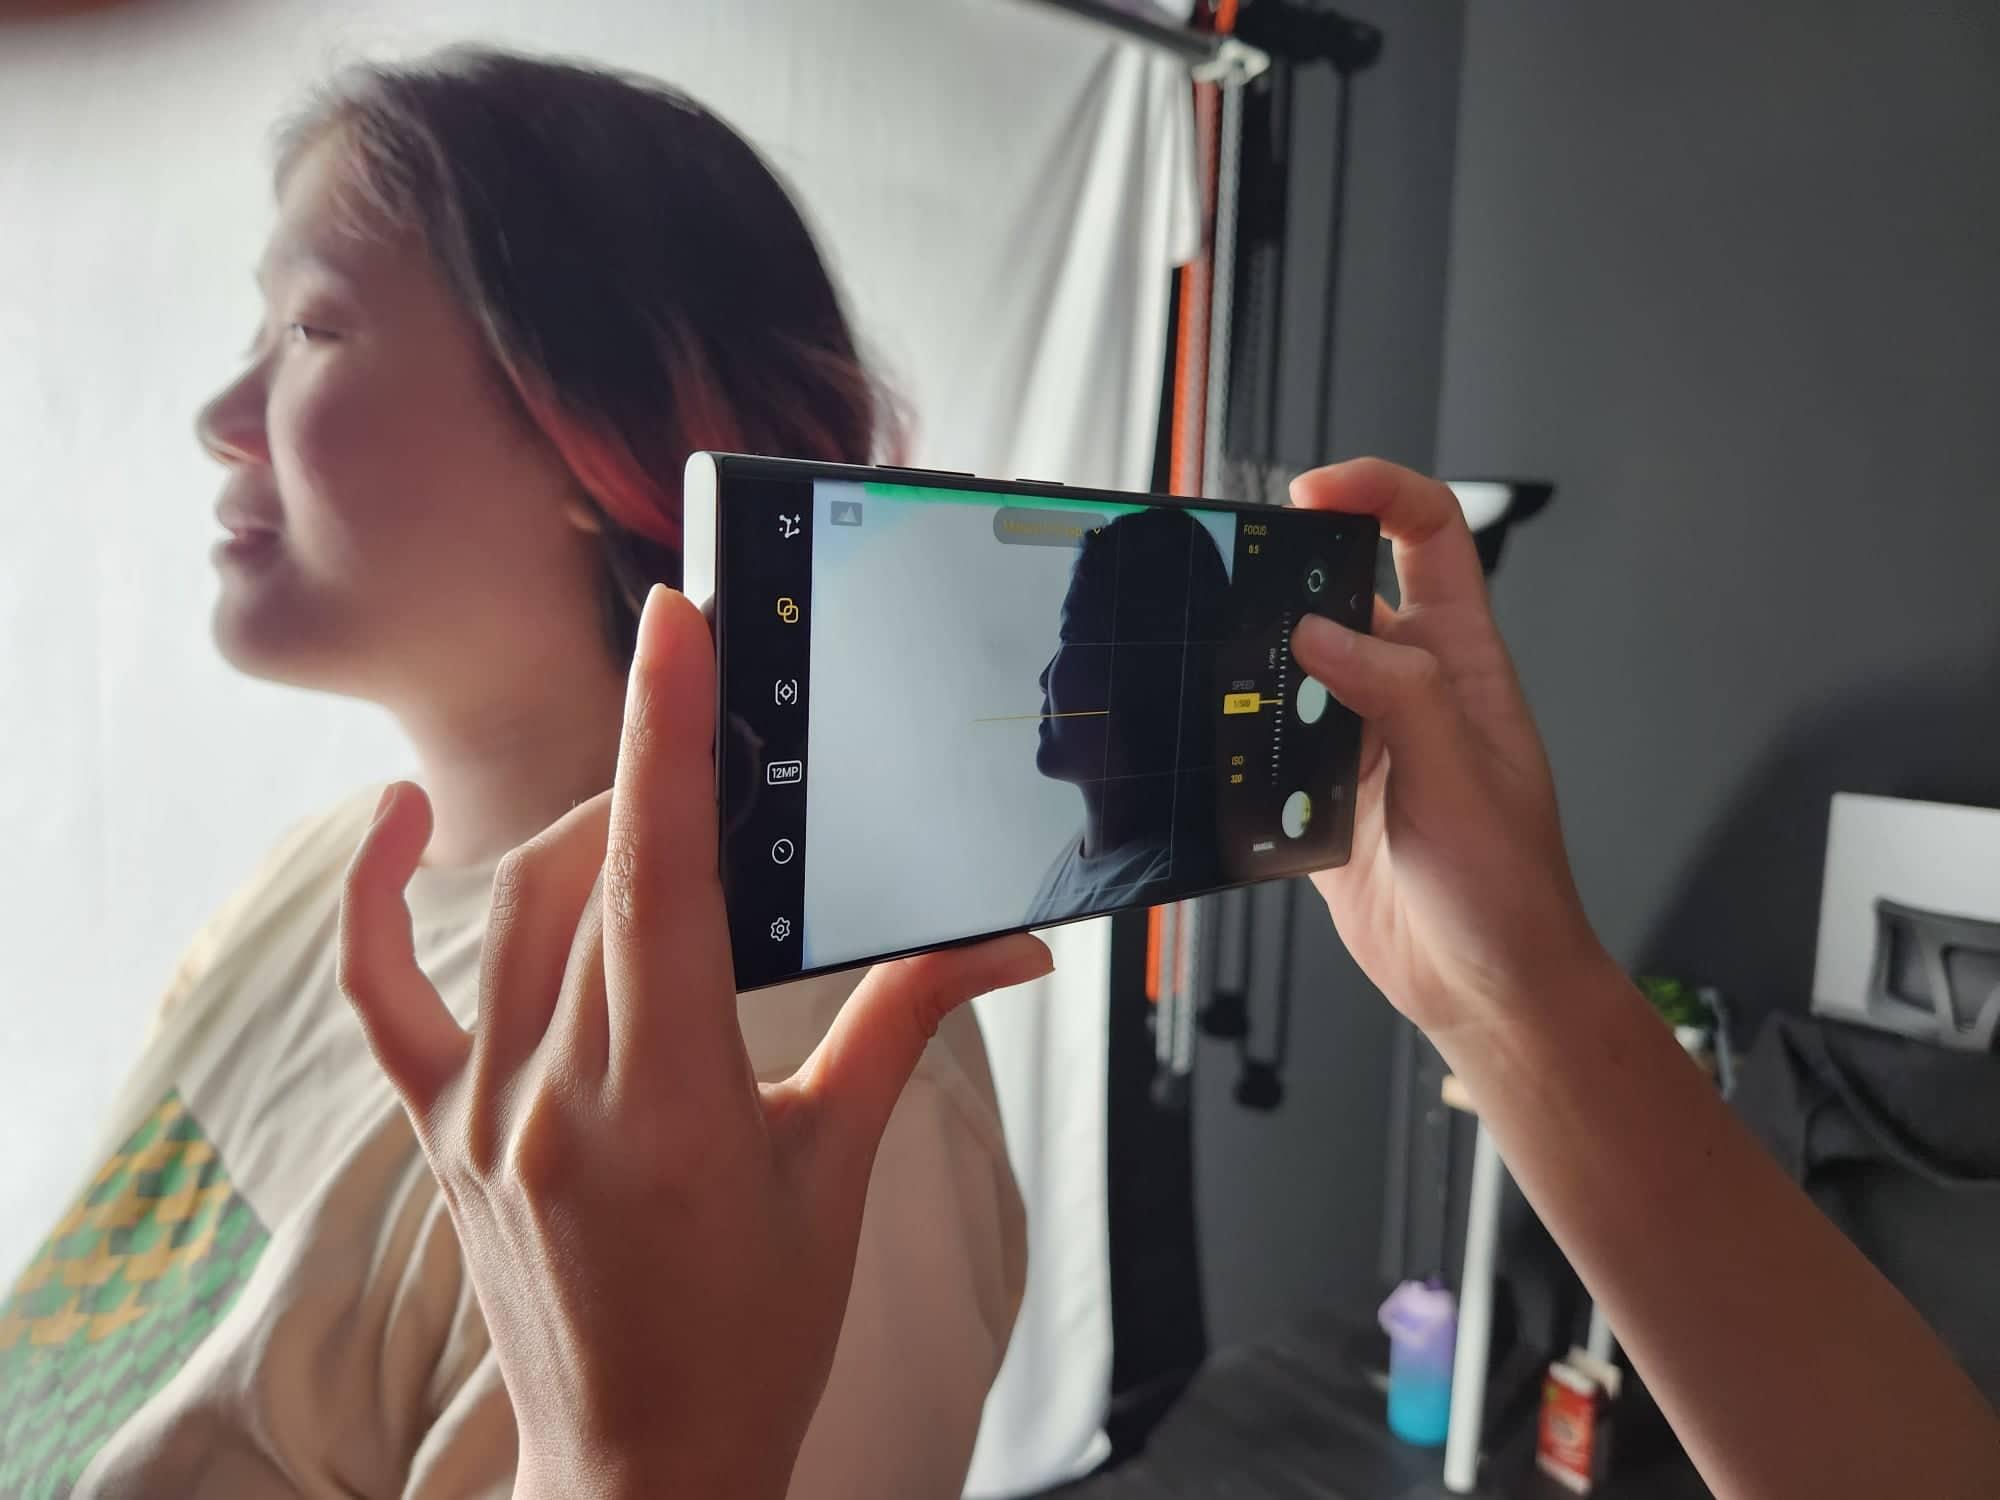
In your Camera app, open ExpertRAW and select the Multiple Exposure setting. You can set the number of exposure and type of overlay according to how you want your images to turn out. For ours, we used the following settings:
Shutter: Manual
Overlay: Bright
Exposure: 2
You’ll also need to play with the ISO and shutter speed so that your silhouette is dark enough, but the background should still be bright.
2. Capture Your Secondary Image
Once you’ve gotten your silhouette, run — and I do mean RUN — to the scene or texture you want to overlay on your silhouette and snap that. Unlike traditional double exposures on film, the double exposure feature on the Galaxy S23 Ultra does the overlay directly in the camera app, so you can’t exactly stop and save in between your exposures. Make sure you have all your layers handy before your shoot!
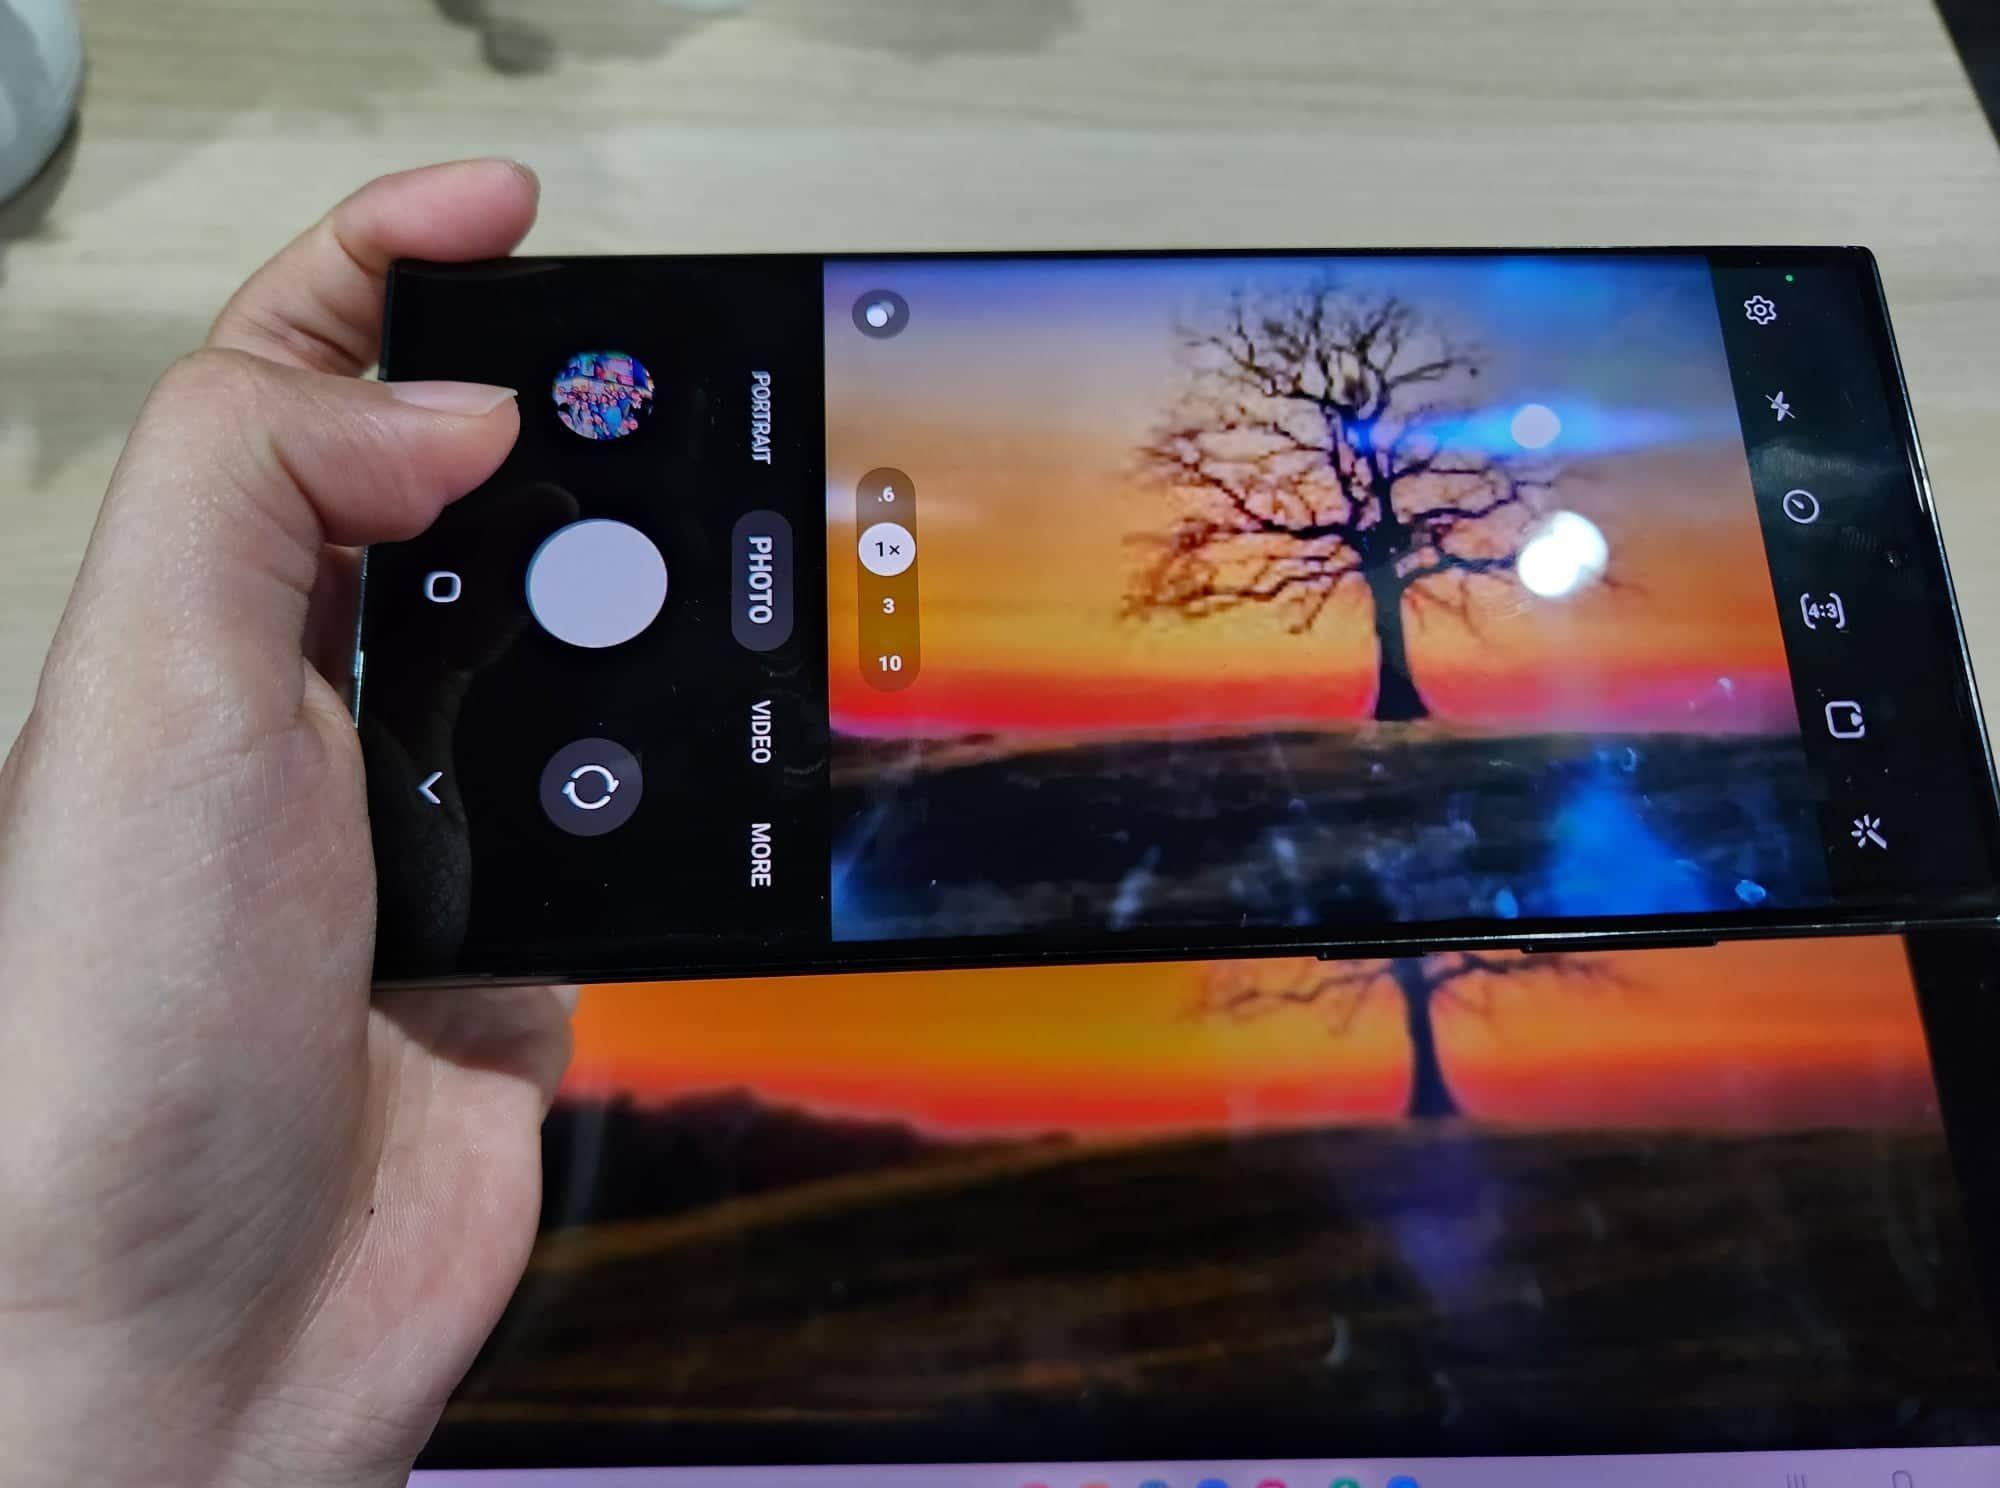
Pro tip: You can always display a photo of your second layer on a tablet and shoot from there!
When capturing your secondary layer, make sure it’s bright to the point of slight overexposure for the best results. Again, adjust the ISO and shutter speed to get the optimal lighting.
On the Bright overlay, the secondary layer will come through the darker parts of the first photo, which should be the shape of your silhouette.
3. Check And Repeat, If Needed
If this is your first time trying out Multiple Exposures on the Galaxy S23 Ultra, you might not get the desired result on your first try — heck, we’ve been through plenty of trial and error even though we’d like to say that we’re quite familiar with the phone at this point.
What gave us the most trouble was adjusting the lighting of both exposures. If the background of your silhouette is not bright enough, then your second layer will bleed through to the background and make you lose the definition of the silhouette.
Once again, patience is key to a great double-exposure photograph. So if it doesn’t turn out properly, don’t be afraid to rinse and repeat!
Our results:

Double exposure is a great way to express your artistic expression and create striking images that stand out against the competition. Now, this breathtaking photography technique is no longer confined to top-tier photographers —you can do it with just a smartphone too!
For more creative inspiration #withGalaxy S23 Ultra, visit here to learn more.