If you’re not sure where to start in 3D printing, you’ve come to the right place.
First known in the 1980s, “stereolithography” printers, which is what 3D printers were referred as, were meant for commercial and industrial use. They also cost a pretty penny (priced at 6 figures). It wasn’t until 2012 when prices for these printers began to drop.

Today’s 3D printers (that you’ve probably heard about online) are much more user-friendly and tech-advanced in terms of operation. With the right adjustments, you can now print out ready-to-use prototypes or your intended final products in just under a day (depending on the size and quality of item)!
How Do 3D Printers Actually Work?
There are two kinds of 3D Printers; FFM (fused filament manufacturing) and SLA (stereolithography) printers.
Essentially, FFM printers melt plastic filament, and through its moving head (nozzle), deposit the melted plastic, layer by layer, into a solidified product. Various types of plastic filament include ABS and PLA, with the former being inexpensive and sturdy while the latter is biodegradable yet tough. They come in many different colours too!
Meanwhile, SLA printers are more limited in terms of material and filament colours. The printer utilises either ultraviolet laser or a DLP projector and can be tough or flexible in terms of end-product texture.
Where To Get 3D Models For Printing
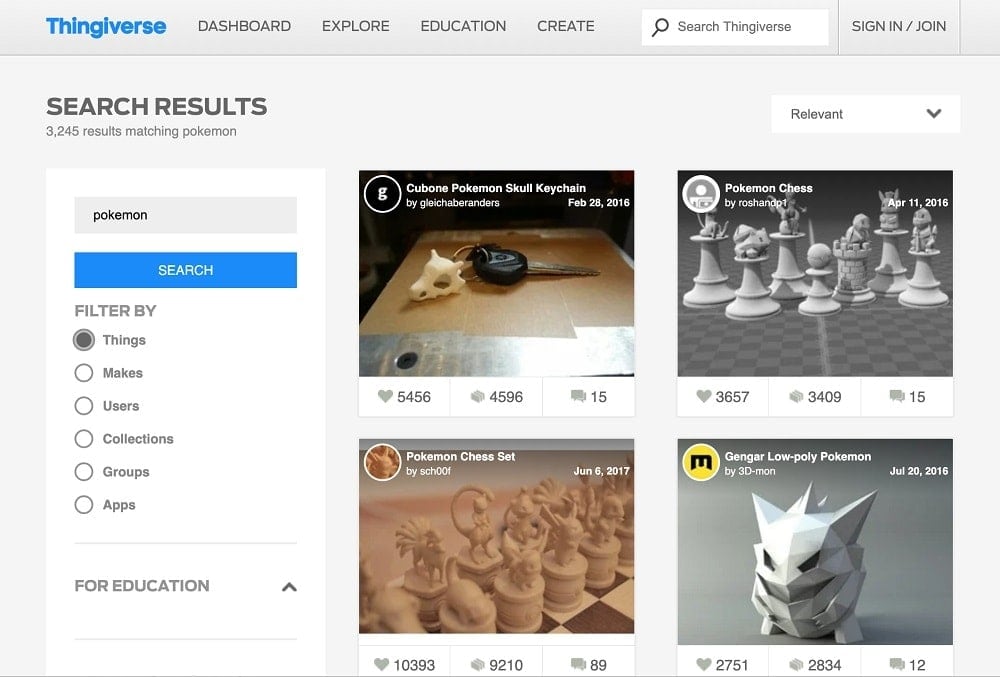
If you don’t know how to whip up your own 3D models, fear not! There are tons of portals that offer free (and paid) models for you to print out. Our favourites are Thingiverse & Pinshape.
So all you have to do is upload the files onto a 3D printing software (some printers come with their own software), and customise or choose presets (if any) for printing settings. For customisation, this part needs a little tweaking and research as it can make or break the final quality of your product.
For example, if you are in a cold environment, make sure the printing bed is hot enough so that the filament can stick and layer well instead of drying too fast.
Then sit back and relax as you leave it to print automatically.
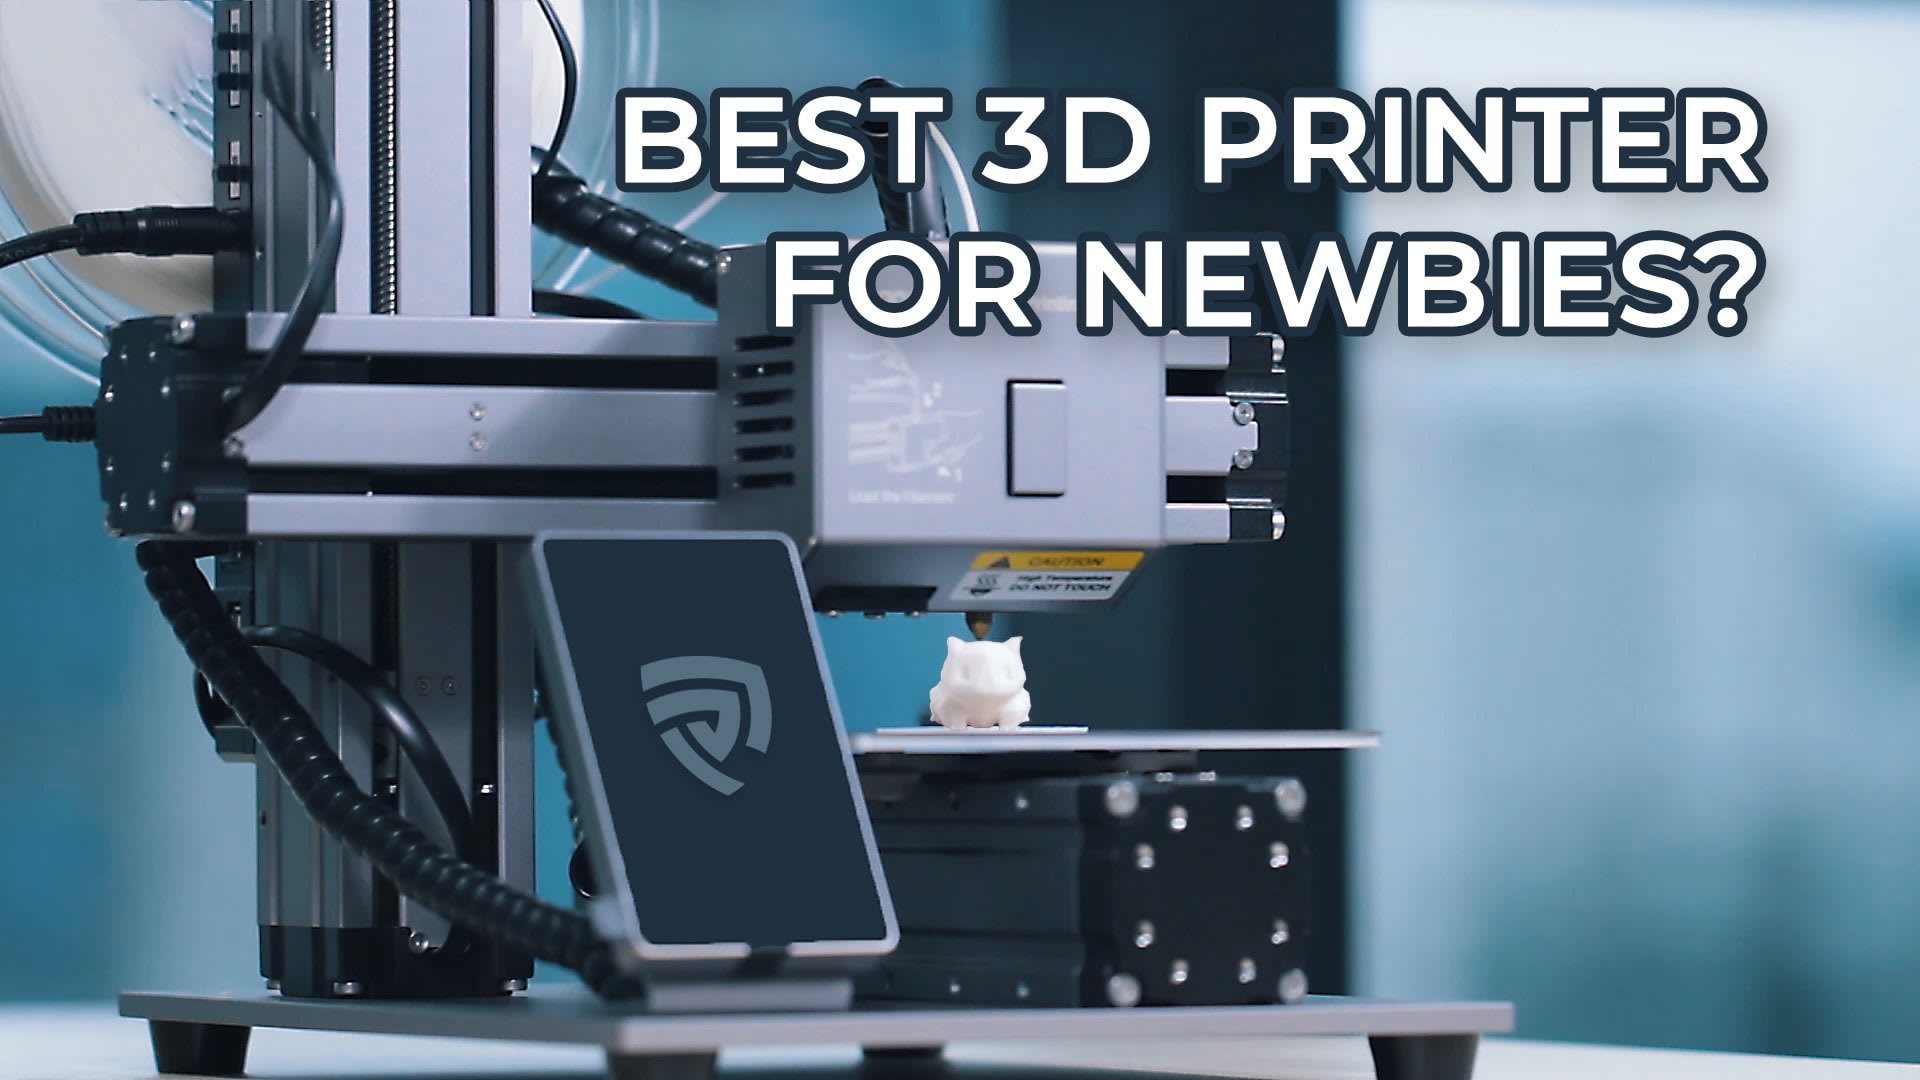
Snapmaker - Recommended For Our Fellow Beginners
A happy ending to a successful Kickstarter project, the FFM Snapmaker 3D 3-in-1 Printer (also commonly known as Snapmaker 1.0) is aimed towards beginner users who are looking to dabble into serious 3D printing or as a hobby. It’s supposedly an easy-to-use, affordably priced 3D printer that also offers CNC (wood) carving and laser engraving, all the while maintaining quality results.
As you already know, we have little to almost no clue about operating a 3D printer. In my experience, I have friends who do 3D printing but their machines are generally bigger and are made with a lot more wires and parts.
Setting Up
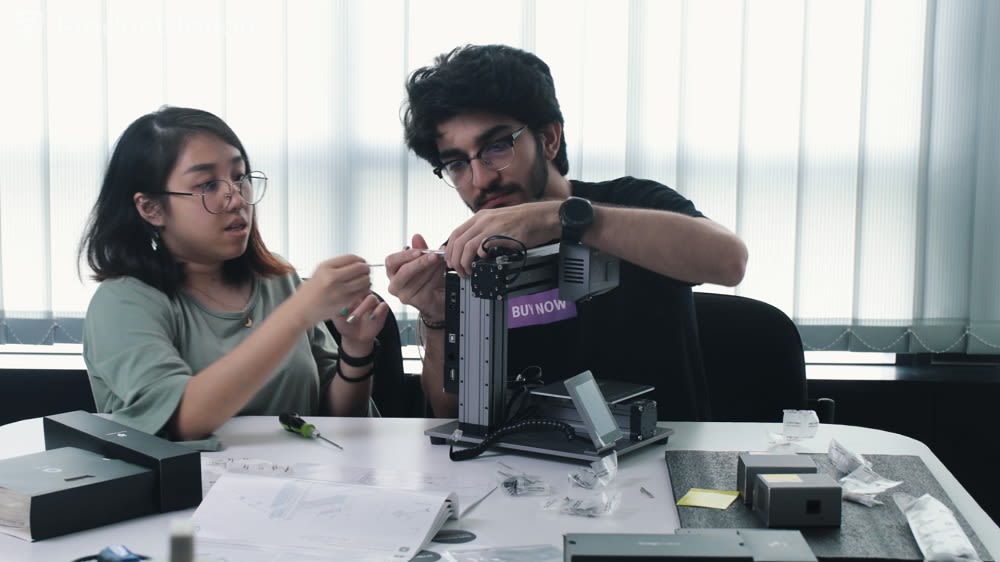
Building the Snapmaker was surprisingly easier than expected.
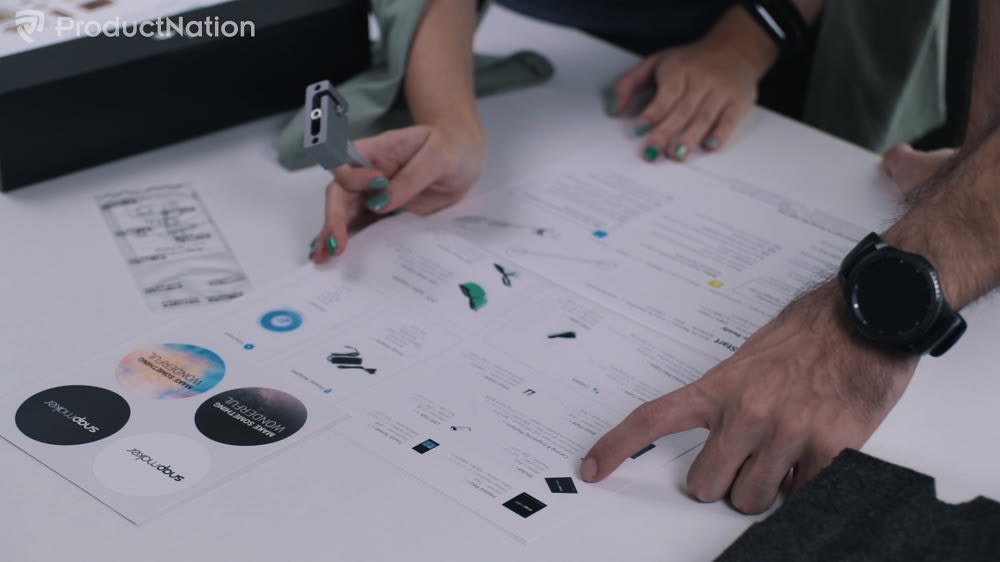
The Snapmaker comes with a big manual that features instructions via clear and easy-to-read diagrams. If you’re familiar with setting up IKEA furniture, it’s a similar experience. Moreover, there wasn’t actually a lot of different, complicated parts to begin with. Within 25 minutes, the printer was ready to print!
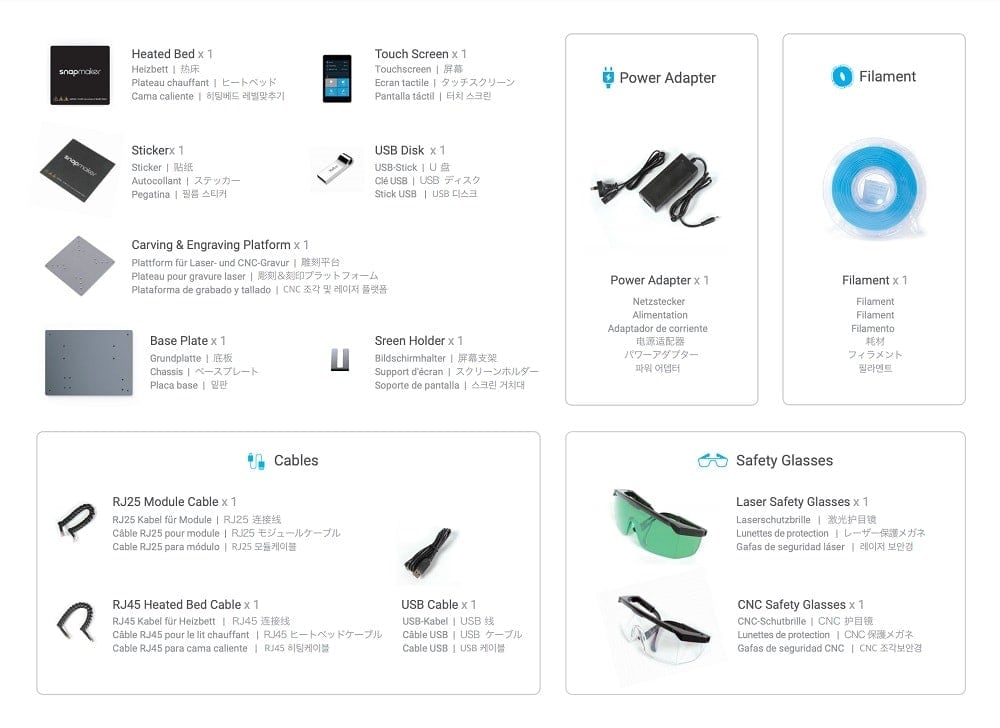
You’re given everything from screws and nuts to printing plates (bed) and a screwdriver to complete everything yourself. The set even comes with safety goggles and a 0.5kg worth of PLA filament plastic which has details on the recommended heating temperature.
One of the best things about the Snapmaker is that it's a modular printer which offers upgradeability and easy maintenance to its users. Unlike other 3D printers which offer little to no upgrade options, Snapmaker lets you add on more parts to it like how you'd enhance your desktop PC.
So this means you can work with the printer from your beginner days into more advanced projects!
We must add that the parts do not feel cheap at all. Everything was packed neatly in black styrofoam which seemingly makes the whole setup less terrifying.
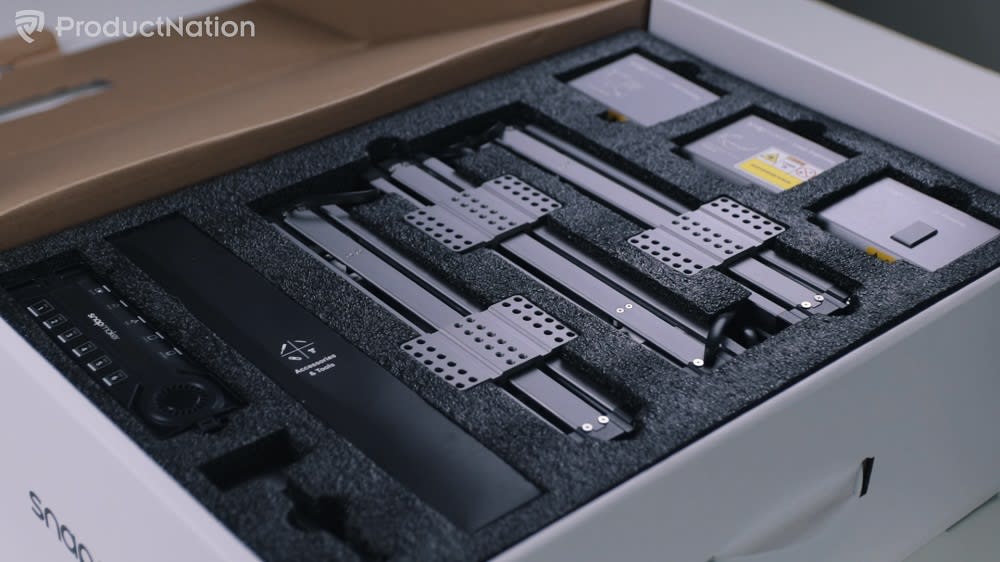
What’s in the box

Before you start making things happen
Snapmaker has its very own PC software - Snapmakerjs, which supports various file types for all your 3D printing, laser engraving and CNC carving needs. Very beginner-friendly, you can either choose to do your own settings or go for one of the software’s preset qualities. Of course, the higher the quality, the longer it takes to complete your project.
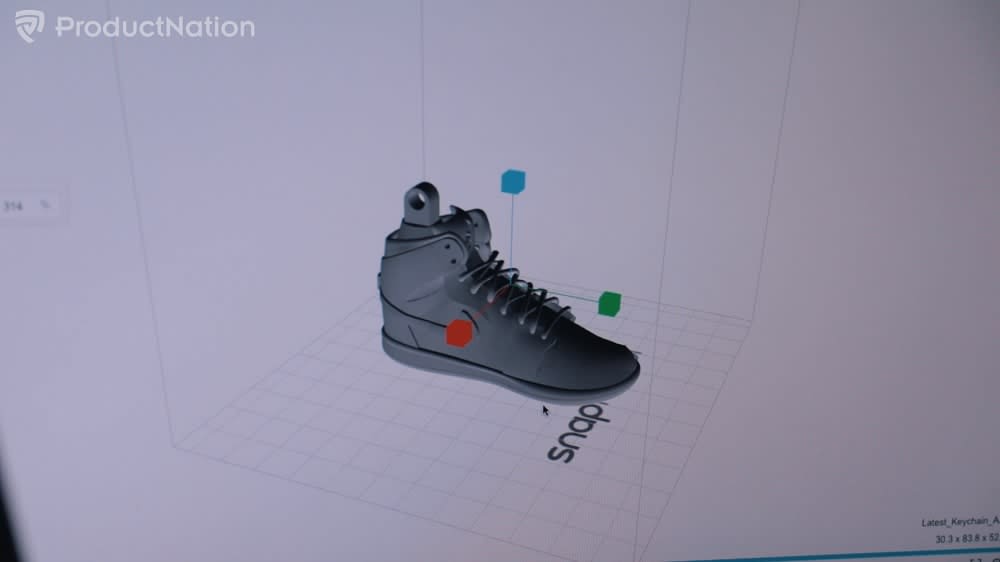
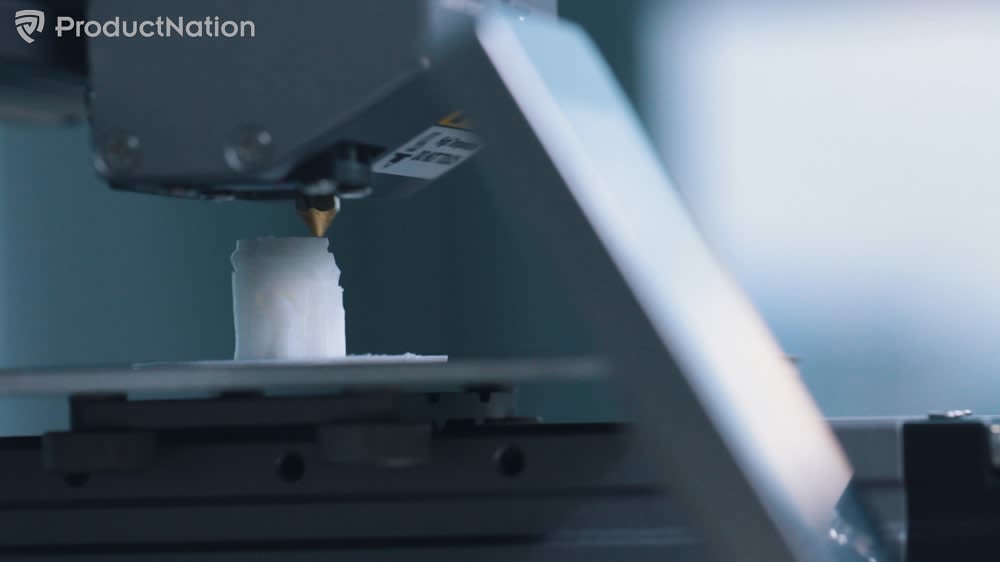
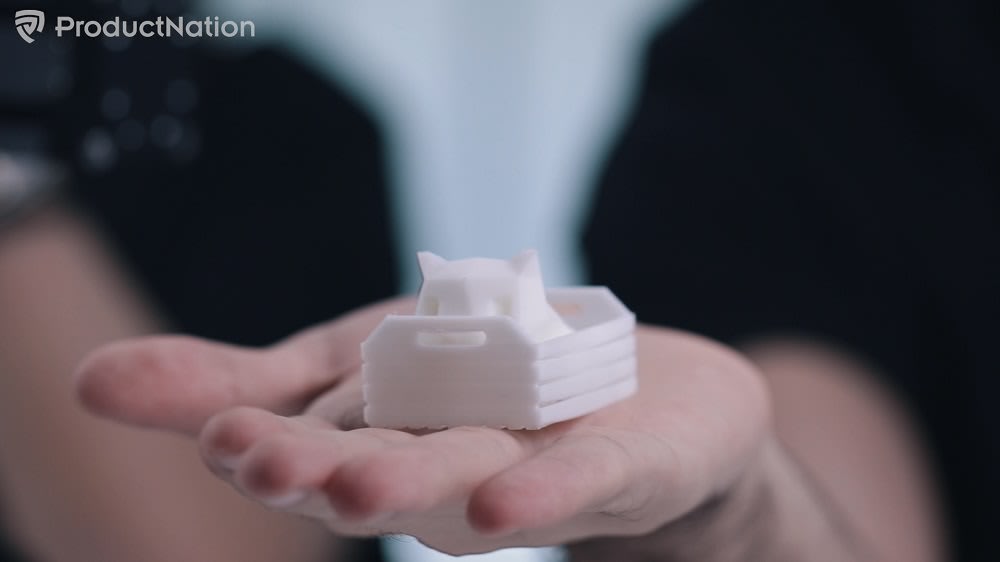
3D Printing
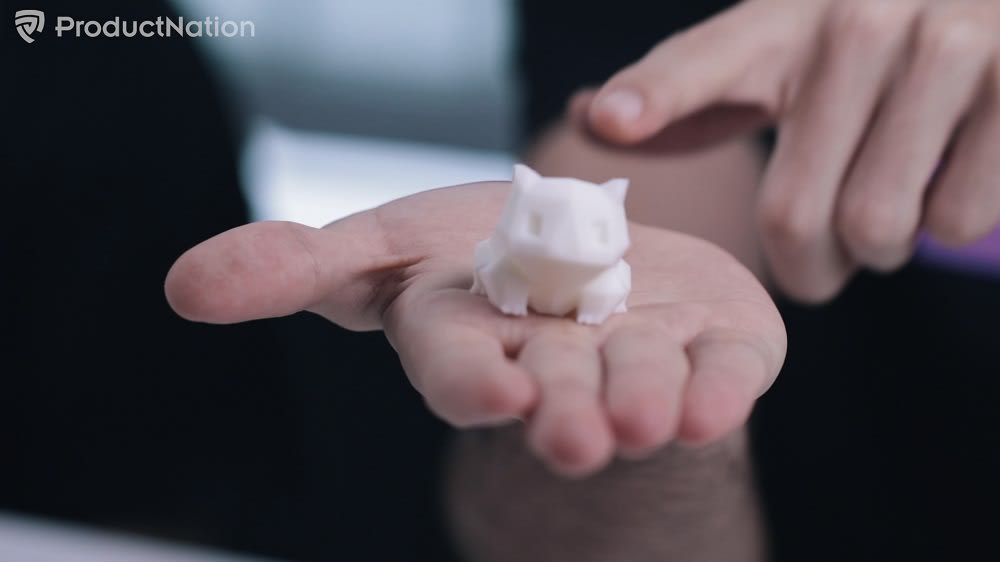
While we hardly had any problems setting up, we came to realise that more care was needed when loading the filament. Our nozzle actually got clogged as we didn't insert the filament properly the first time.
Luckily, Snapmaker comes with spare parts so we replaced it with the backup nozzle. Not wanting to have any more trouble, we decided to search for Snapmaker’s official videos that guided us on inserting the filament.
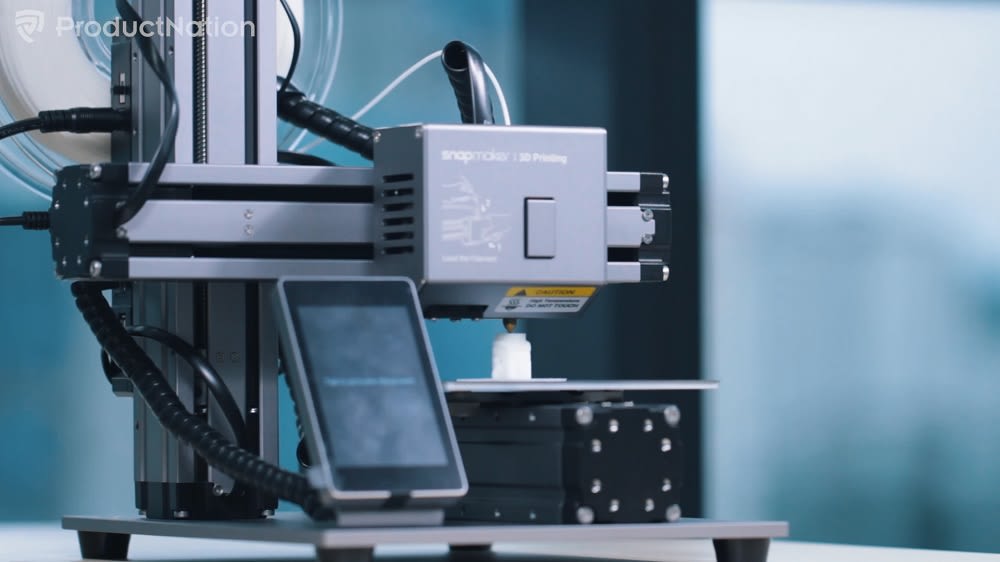
Comparing to some 3D printed samples from our friends, the finishes on our test models were more than satisfactory, with the estimated time of delivery usually on the dot or earlier. Models came out looking detailed as well as sturdy. Might we add that with the printer's modular feature, Snapmaker also has additional z-axis extensions available so you can increase the size of your printing space.
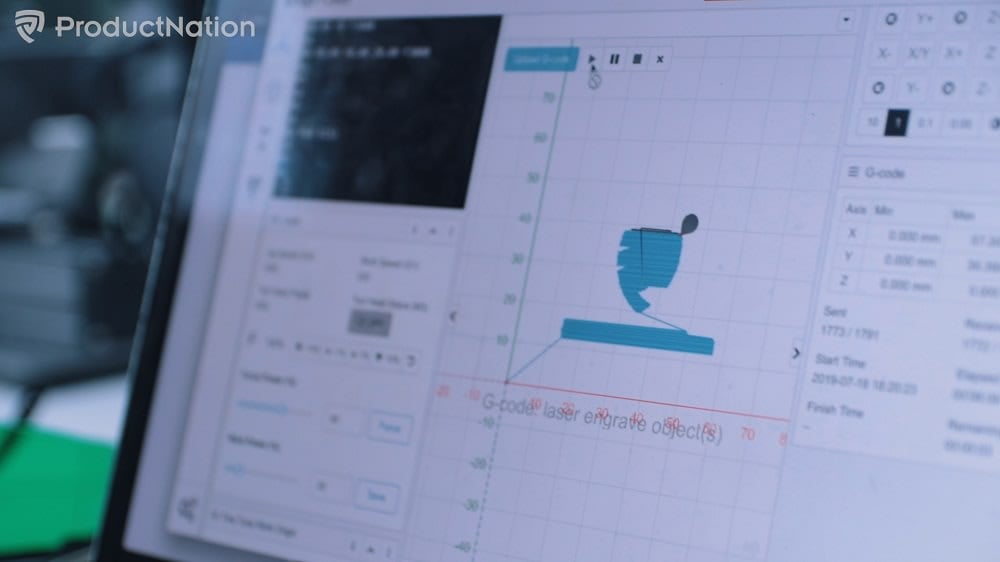
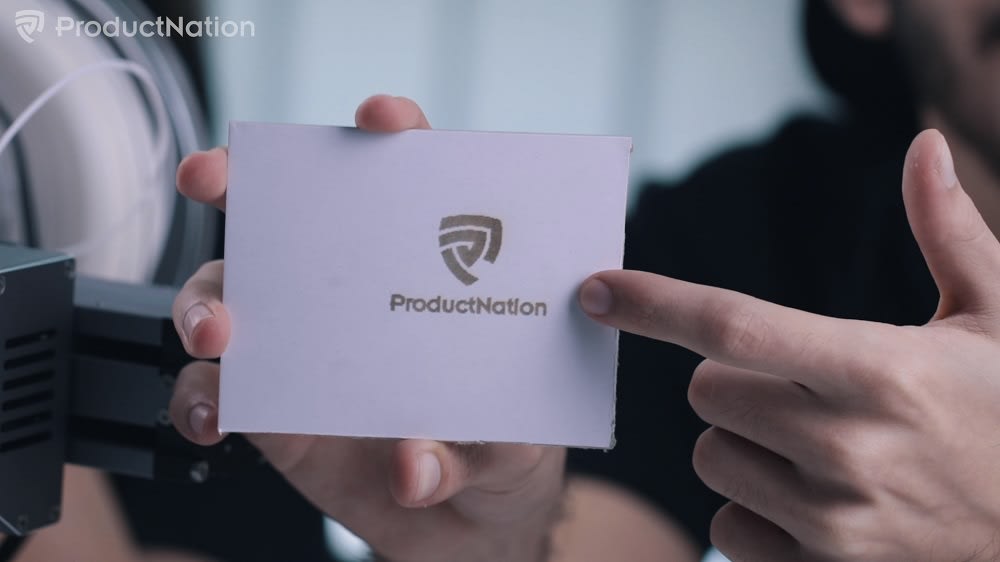
Laser Engraver
You’re given a different module for laser engraving apart from 3D printing. There’s no need to reassemble the whole machine; just remove the 3D module (which is done by just undoing 4 screws) and fix in the laser engraver. Following another quick guide, calibrating and inserting our files was a seamless process.
As mentioned earlier, a pair of safety goggles are given to protect your eyes against the lasers. Setting up from Snapmakerjs was very straightforward, as we adjusted the laser power easily without any problems.
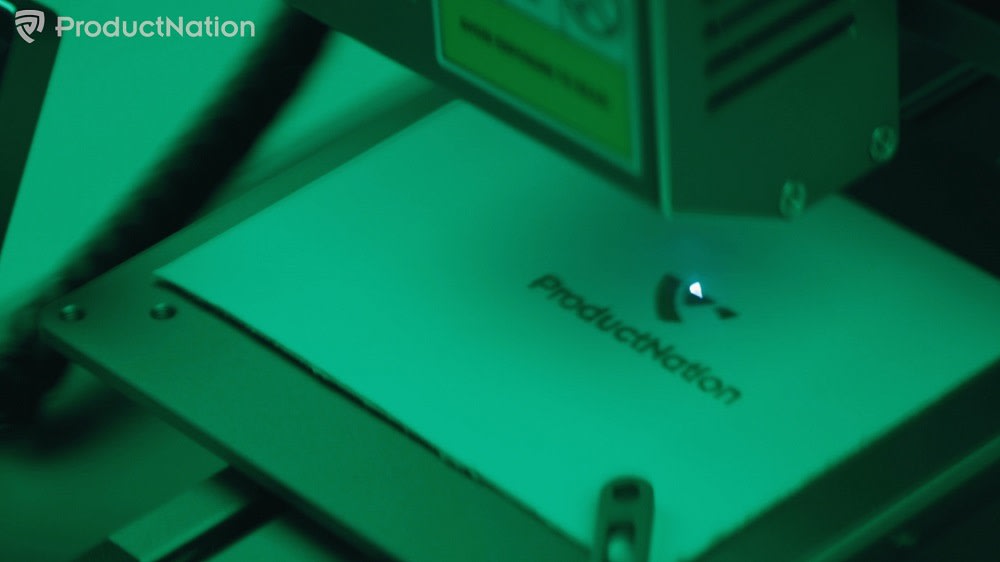
The results are precise and clear even though engravings were done on a cheap mounting board piece. Of course, the laser engraver can work on many other materials such as cork, leather and acrylic. Here's a full list of workable materials and guides on how to work with them.
We have come to find out that some users aren’t satisfied with the laser engraver’s 200mW power. If you'd like, you can purchase the more powerful Snapmaker 1600mW laser module on their website. Nevertheless, the 200mW module is still great for newbies to start with.
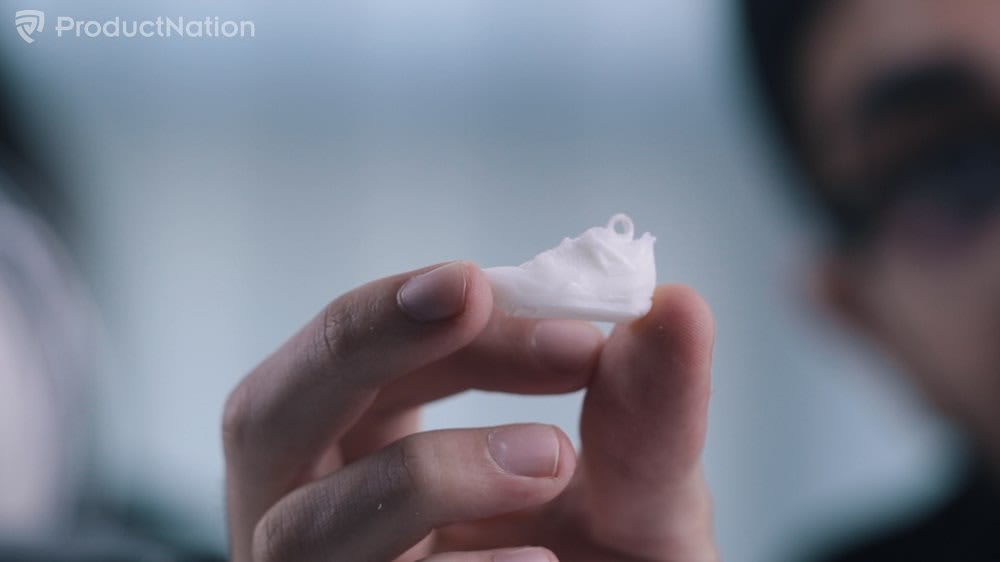
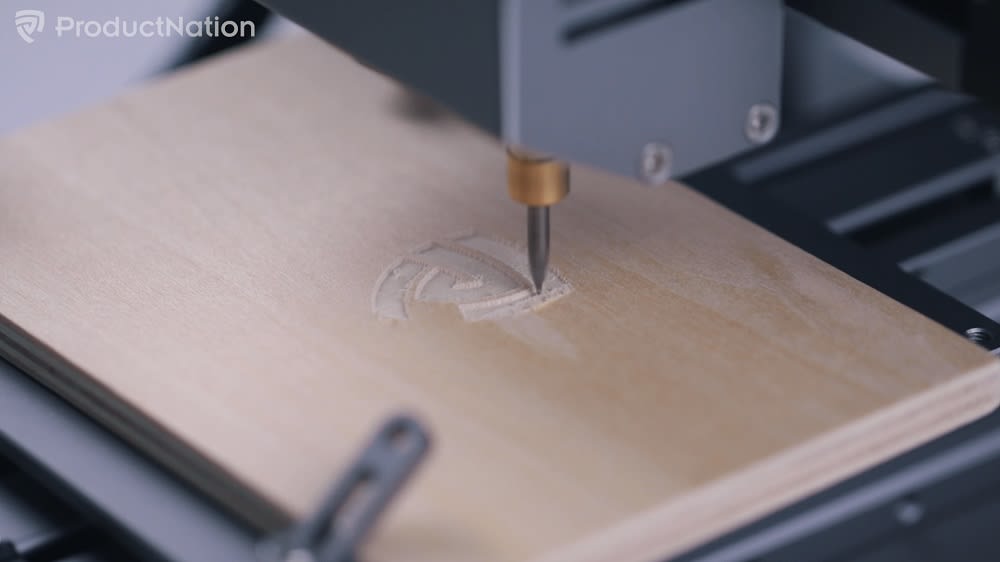
CNC Carver
Similar to setting up the laser engraver and the 3D printer module, we inserted the CNC carver without needing to disassemble the machine. After that, just upload the image or 3D file that you want onto Snapmakerjs. Remember to put on the provided clear goggles to protect your eyes from wood splinters.
Admittedly, we weren’t expecting precise and detailed carving seeing as how small our image is. Moreover, we used wood of normal quality that we got from Daiso to carve onto. Glad to say that sharp edges and curves are where they are supposed to be.
Our verdict
Snapmaker does a good job at presenting everything clearly to a couple of beginners like us without compromising on result quality. Seeing as how you’re not just getting a 3D printer, but also a laser engraver and a CNC carver, it’s a good machine to start with if you are set on making your own special prototypes and models. And when you're ready, add on extensions to fully push the printer to its limits.
The Snapmaker 1.0 is available for USD $799 on their store. But you can use our local link below for easy pre-order.
Watch our hands-on review of the printer here!
